Note: This post contains affiliate links.
We hope everyone’s Mother’s Day was as beautifully spent as ours. The girls were super excited to show Gigi the Mother’s Day gift – a Heart Wall Hanger that they helped make before spending the morning at the Arboretum. It was a simple project and our first with our new band saw, so we wanted to share our plans with you.
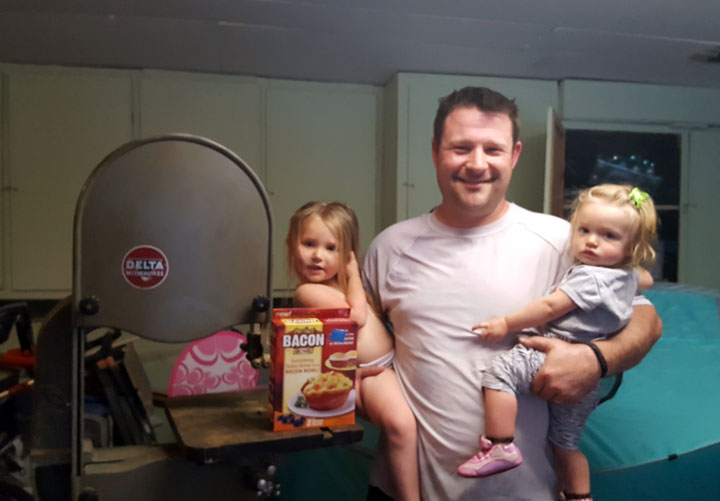
Let’s take a step back – what do you get when you take your husband on a treasure hunt on a beautiful Saturday? If you guessed a Perfect Bacon Bowl and a band saw, you’d be correct. The bacon bowl might not be too surprising as he registered for a quesadilla maker for our wedding – and would like for me to point out it was the first thing purchased off our registry. The band saw was a bit of a surprise, especially since I had no idea it was on his radar, but he puts up with my randomness so I will go with it. Naturally before we brought it home I had already found band saw project ideas on Pinterest but was ready to wait until he was ready to put this new tool to use, thinking it would sit in our garage collecting dust for awhile.
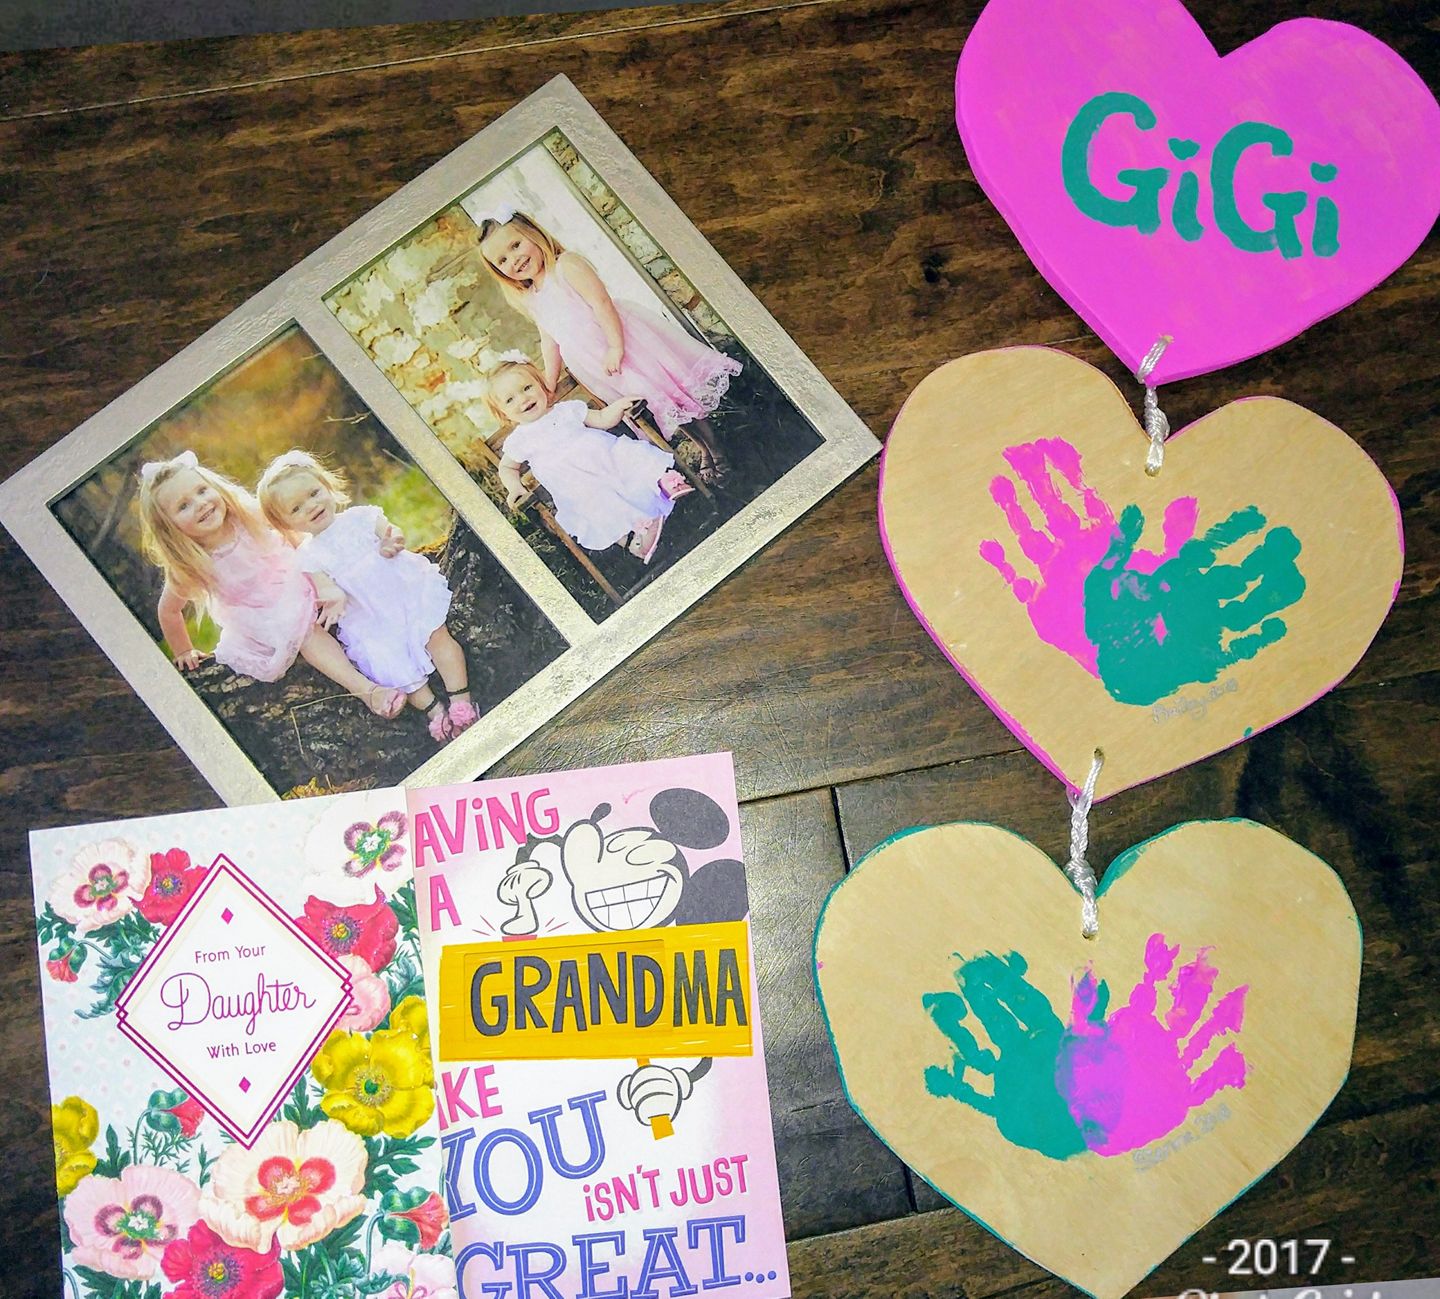
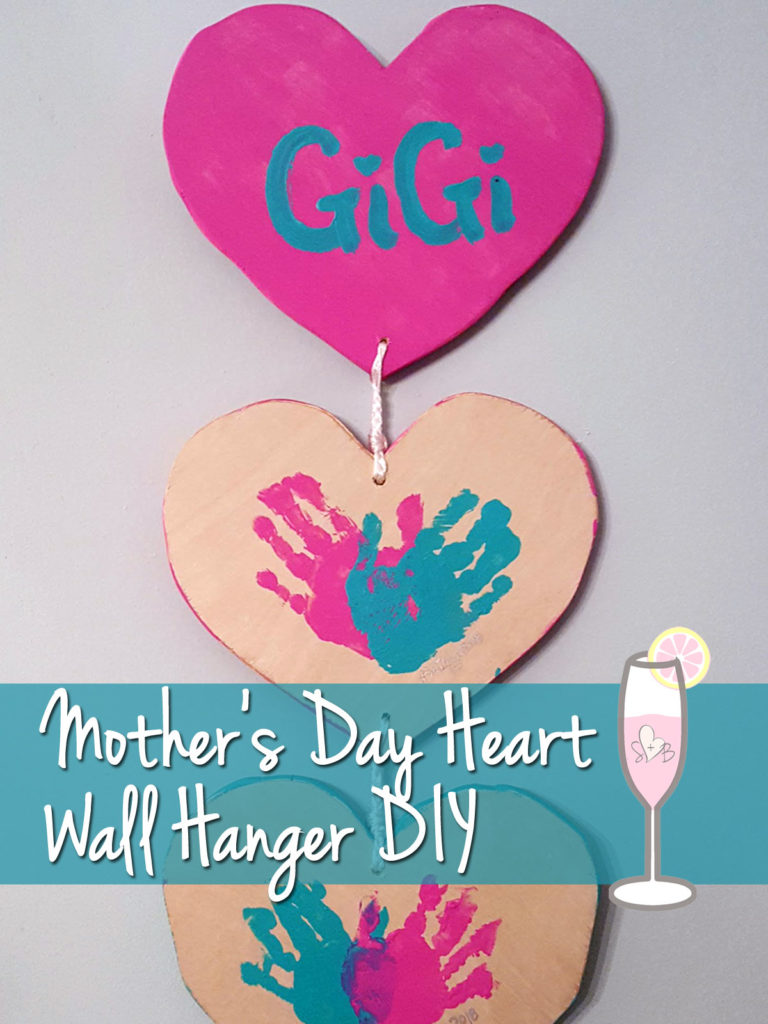
It took less than a week before he came to me and wanted to put together a Mother’s Day gift for my mom to test out the new band saw and wanted help with a design. He wanted to start off with something more simple and thought a heart would be a great way to start. We wanted to get the girls involved and I knew fighting would ensue if there was just one heart to paint so I had him make three in case one didn’t turn out. So we created a Mother’s Day Heart Wall Hanger.
What You’ll Need
- Plywood
- Paint, we used Acrylic Paint 8.45 Oz. Tube (Light Magenta)
and Acrylic Paint 8.45 Oz. Tube (Aqua Green)
- Rope (or thicker string)
- Picture Hanging Kit Asst
We had some scrap plywood laying around so I traced out 3 hearts onto the wood leaving enough space to cut the wood down into squares first to make it easier to do the curved cuts.

After cutting the wood into squares, he took each piece and carefully cut out the curves with the band saw. It’s important to wear safety glasses while doing this project and any other woodworking project and keep the kids at a safe distance in case of splintering.

After each heart is cut, sand down the edges and even out any imperfections. We left some in because we wanted to make it look homemade since it was from the girls, but feel free to smooth the imperfections out.

Once the sanding was done and the edges cleaned up, it was time for the fun messy part. The girls picked the paint colors they liked best and we busted out the paint brushes. Mom tip: when doing hand prints/foot prints brush the paint on their little hands/feet one at a time and quickly place them on the canvas to get a cleaner finish. The kids love it because it tickles and cleanup is a breeze.

Once the hand were completed I painted the edges of the hearts and set them out to dry. For the third heart, the girls helped paint the entire thing pink (of course) and we added Gigi once it was all dry. The hearts dried pretty fast but there were a few wet spots so we used the hair dryer to finish the job.

Once the paint was completely set, we set the order of the hearts and drilled holes so we could attach them. I thought we had some extra rope from an old project but we couldn’t find it so we grabbed some string that we used and braided it to thicken up the strands. My eldest is obsessed with braids right now so this was her favorite part.
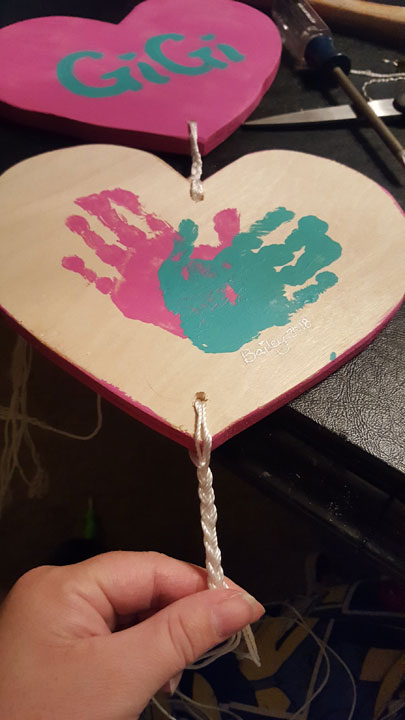
I looped the braids through the hole and adjusted the length before looping the ends back through and securing them with a few knots. We had to adjust the holes a few times due to the thickness of the braids but we made it work and then added some picture hanging hardware to the back and it was ready to hang. Note: We added hot glue to the back to secure the string for extra strength.

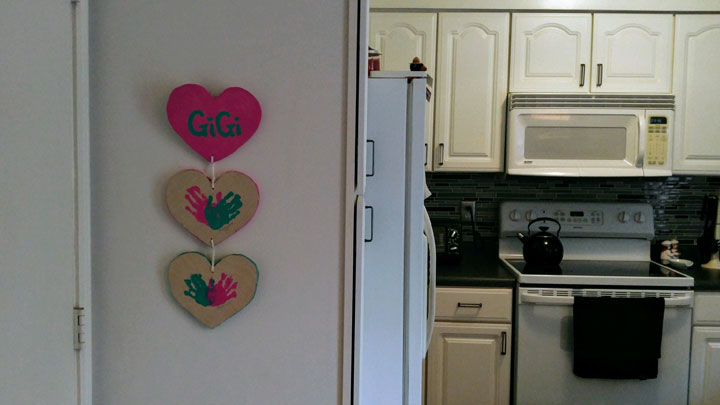
Then we hung it on the wall so the girls could see their handwork.
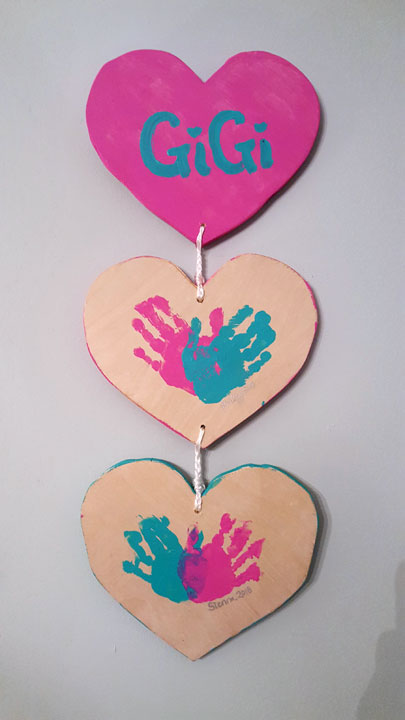
It was a really simple project using pieces that we had from home and the girls enjoyed being a part of the process. Gigi loved it and made sure to send us a pic of it’s new home as soon as she got it hung.