Note: This post may contain affiliate links. To learn more about my affiliations, please see my Disclosure Statement.
We’re taking a look back at another one of our most-pinned projects, our DIY Closet Door Makeover in our Master Bedroom. We started this project before the girls were born when I wanted our house to look like something out of a Z Gallerie catalog without the price tag. This makeover cost us $35 and is still one of my favorite projects.
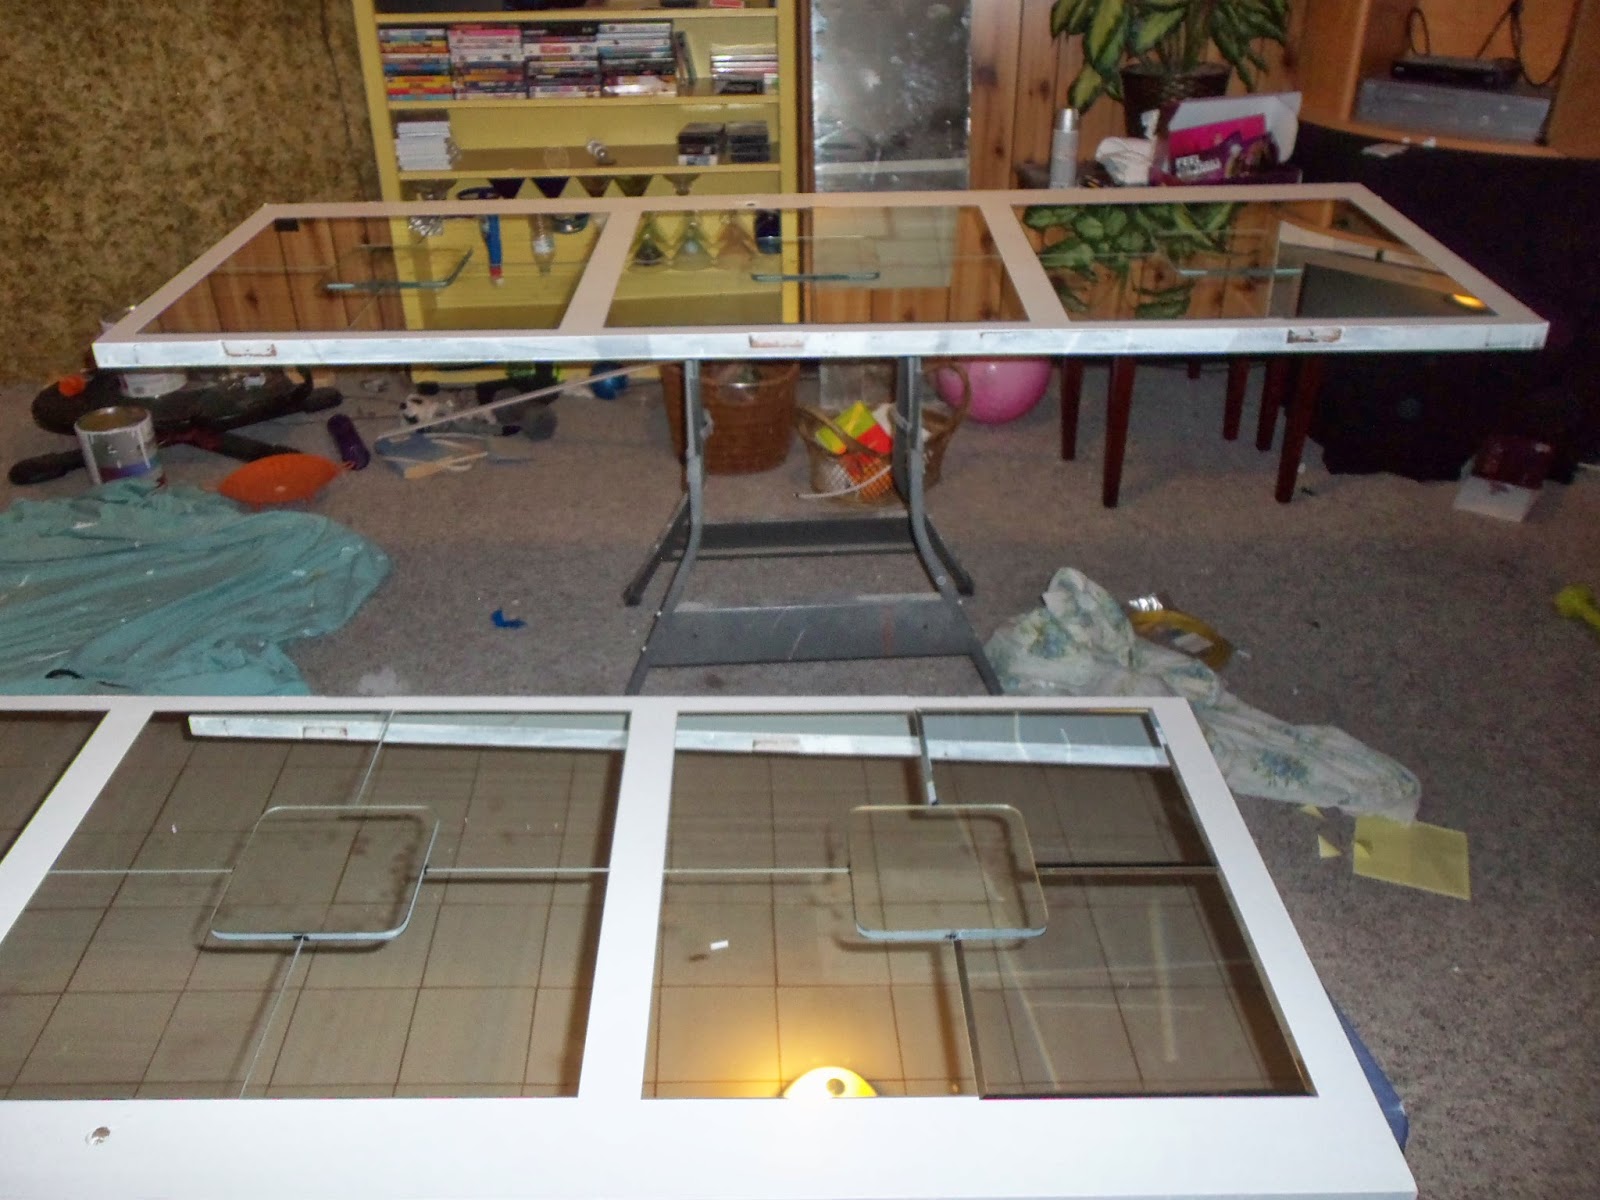
When we remodeled the Master Bedroom we had one big eye sore – the closet doors. They were cheap, boring and didn’t really add anything to the room. We wanted to add a little glam to the room but didn’t want to spend a fortune on new doors when the ones we had were still functional. Take a look:
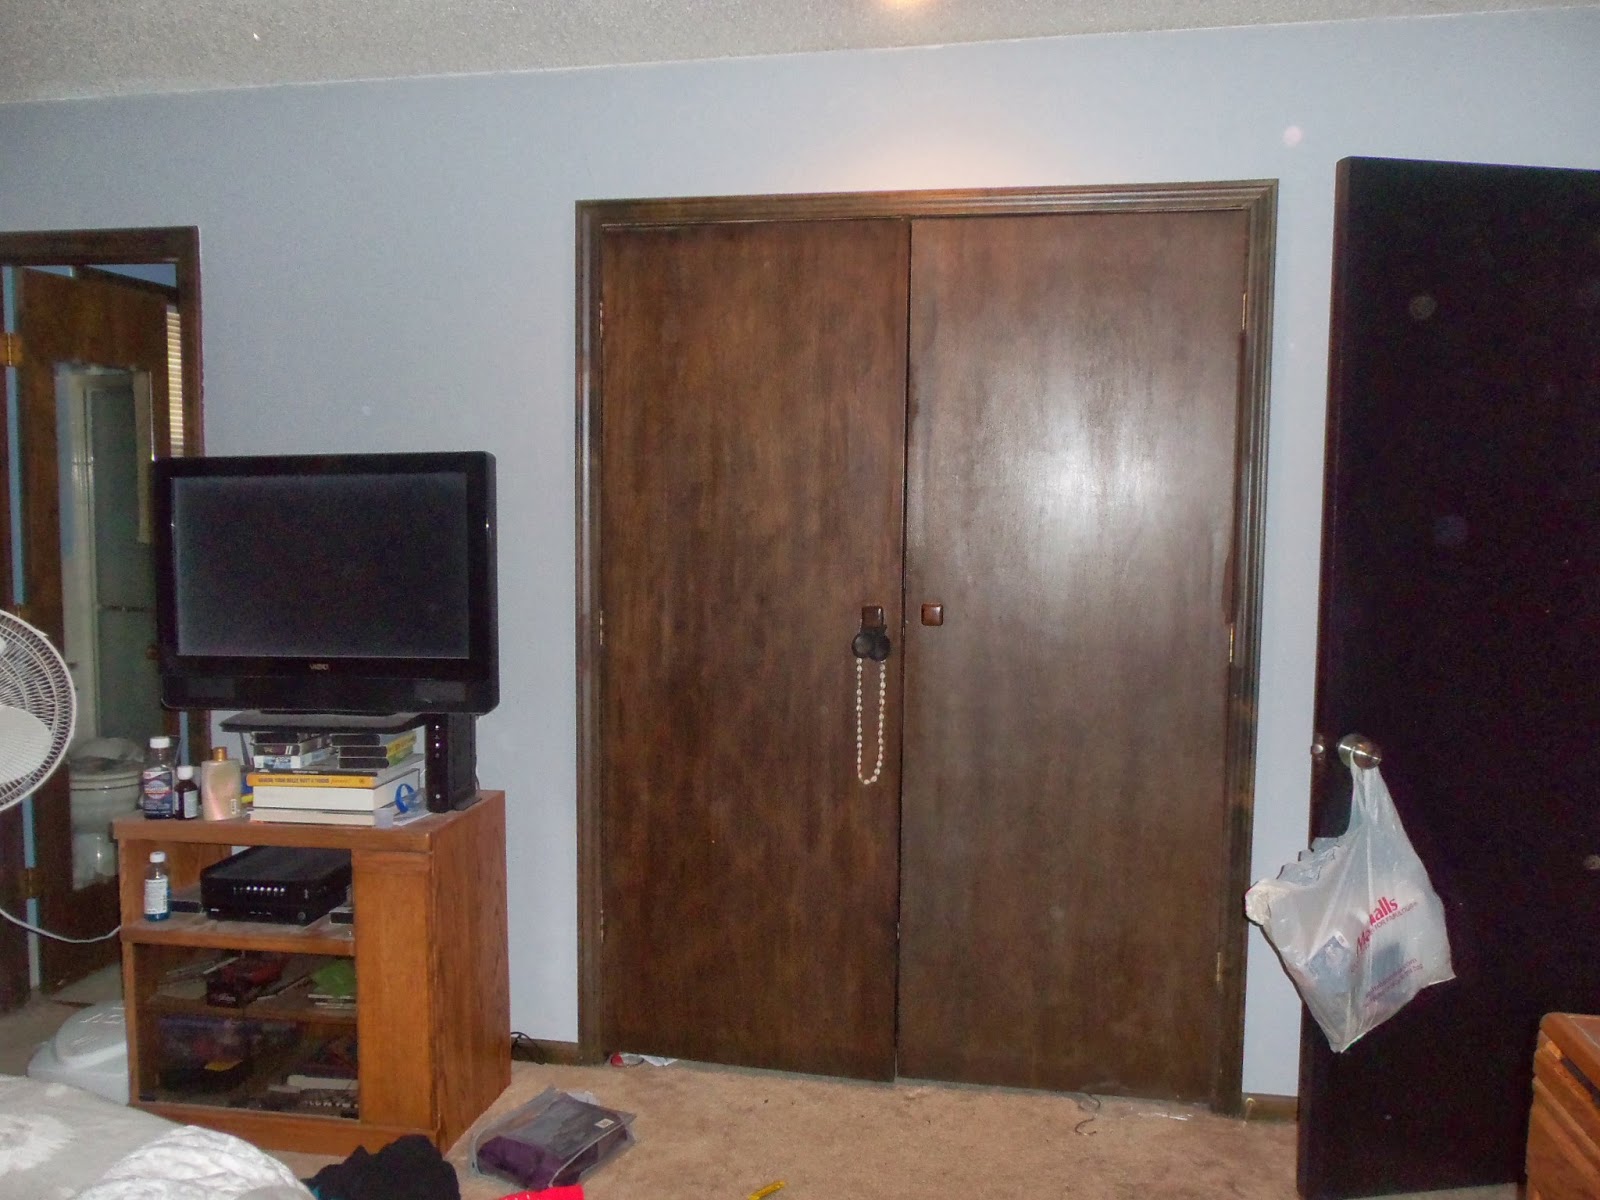
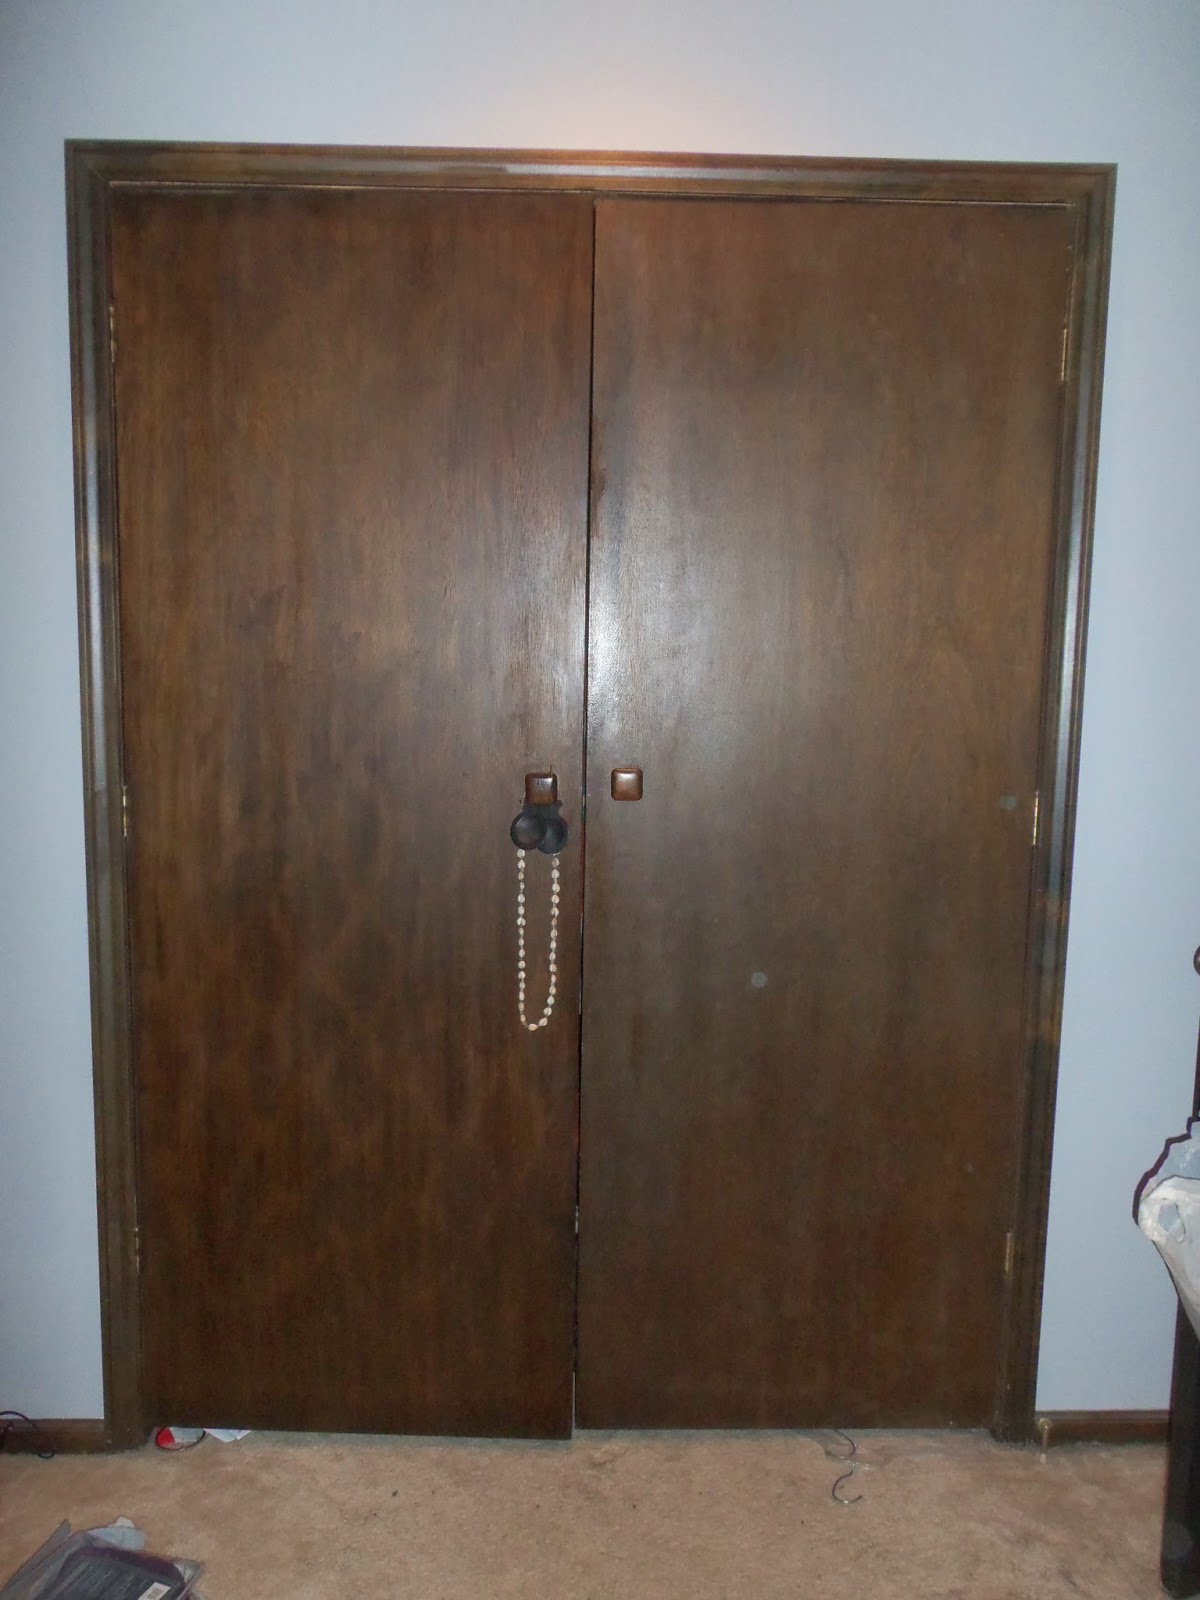
They definitely needed work and I didn’t want to just paint them because then they would be cheap and boring, but in a different color. I wanted to add mirrors but the doors are a really odd size and we would have to spend a fortune to get large enough mirrors cut to size or it would look really out of place.
Also, we have a bunch of 12″ x 12″ mirrors and several smaller mirrors we bought at IKEA as decorations for our wedding and I have been looking for ways to incorporate them into our home decor. We tried several different designs and nothing looked good or would fit with the door knob holes. I was getting a little irritated, but didn’t give up.
I scoured the internet and Pinterest for several weeks but wasn’t finding much that would work with our doors. I was starting to get a little obsessed but then I saw a front door with a design I really liked and thought, I might be able to recreate this with our mirrors (see the purple doors below).

So I went downstairs, got the mirrors out and played around until I got it the way I liked…then all I had to do was convince the hubs. I believe there was an eye roll or two, but he knows that once I’ve set my mind to something, we’re going to at least try it. (I am a Taurus, what can I say)
Lighten things up
After removing the doors it’s time to prep the surface. Remove the hardware and sand down any imperfections so you have a nice smooth surface to paint. Wipe down the doors to remove any dust so that the primer goes down smooth. As with all our projects, we recommend using 2 coats of primer and 2 coats of paint. Start with the backs first and let them completely dry before doing the same process with the front doors.
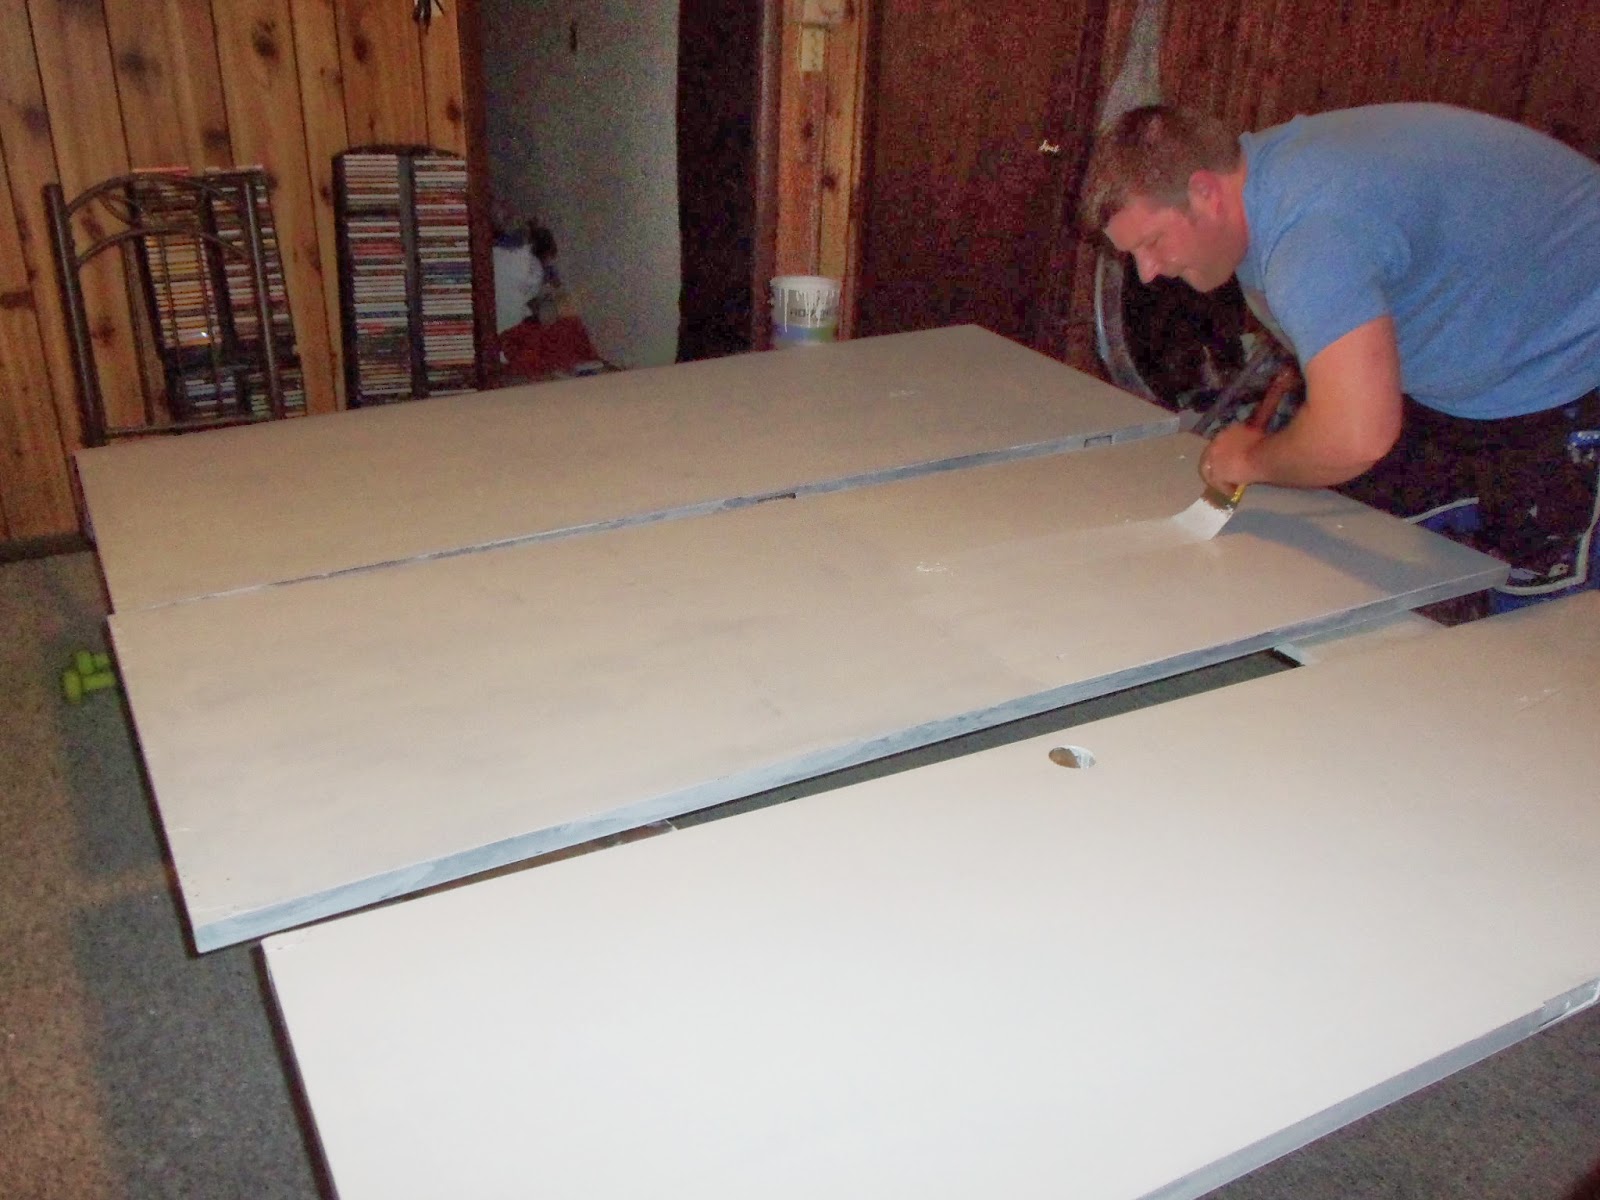
It’s important to make sure that the paint you use has time to dry and set. For our bedroom we used a new paint that had just come out, Benjamin Moore ADVANCE Interior Paint – similar to the quality and durability of BM’s Satin Impervo, ADVANCE is a water-based paint and less harsh (and expensive). It doesn’t take as long to fully set and strengthen, but we still recommend 3-4 days before adding back the hardware and decorating. We started painting the doors at the beginning of our Master Bedroom remodel, that way they had plenty of time to set.
Mirror Design
Once the doors were painted, we laid out the mirrors again to figure out spacing and the finishing pieces. I had found these decorative mirrored knobs that I loved so we added them to the doors before laying out the mirrors (hubby’s idea) and even though they looked around the same size as the old knobs, they were slightly bigger and caused some issues with the spacing of the mirrors so we had to adjust the measurements slightly.
The doors are really light and pretty much hollow, except for where the door knob sits. Of course, the hole is located pretty far from the edge and not even at all, so we really had to find a design that we could use that could work around this hole. We thought about drilling another hole but were worried we might split the door.
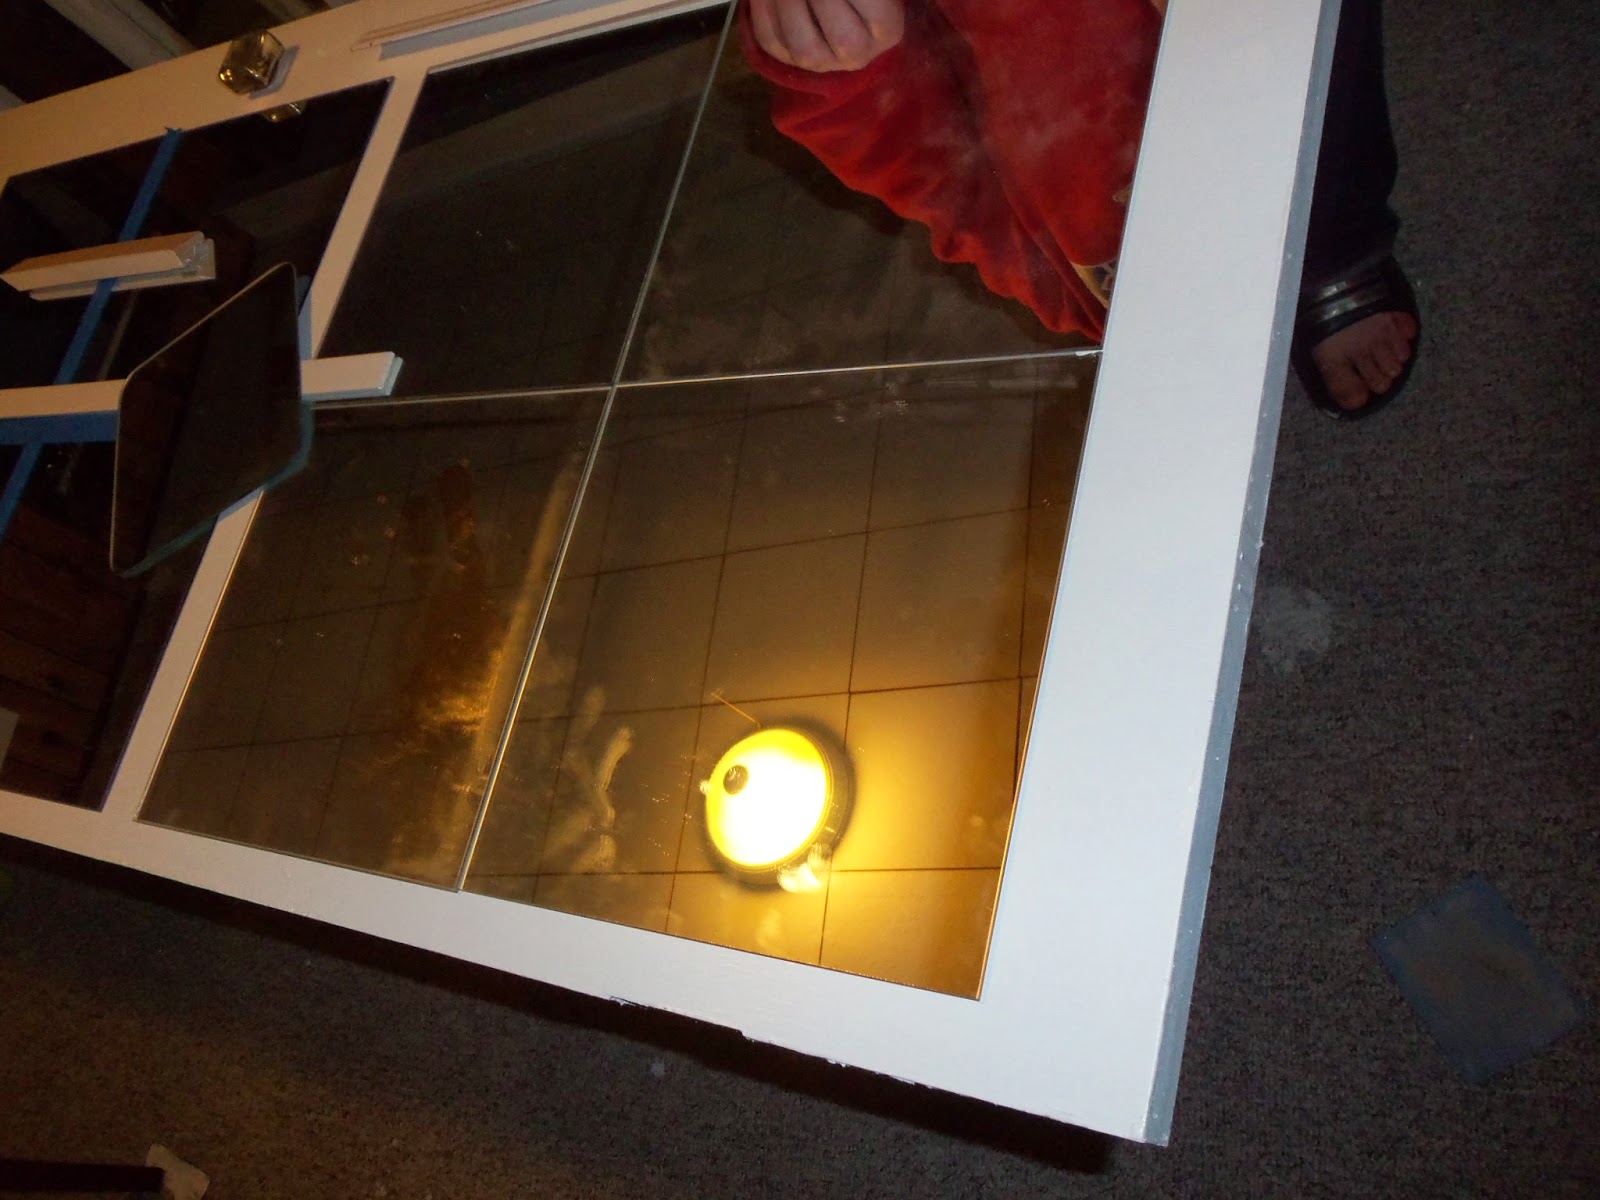
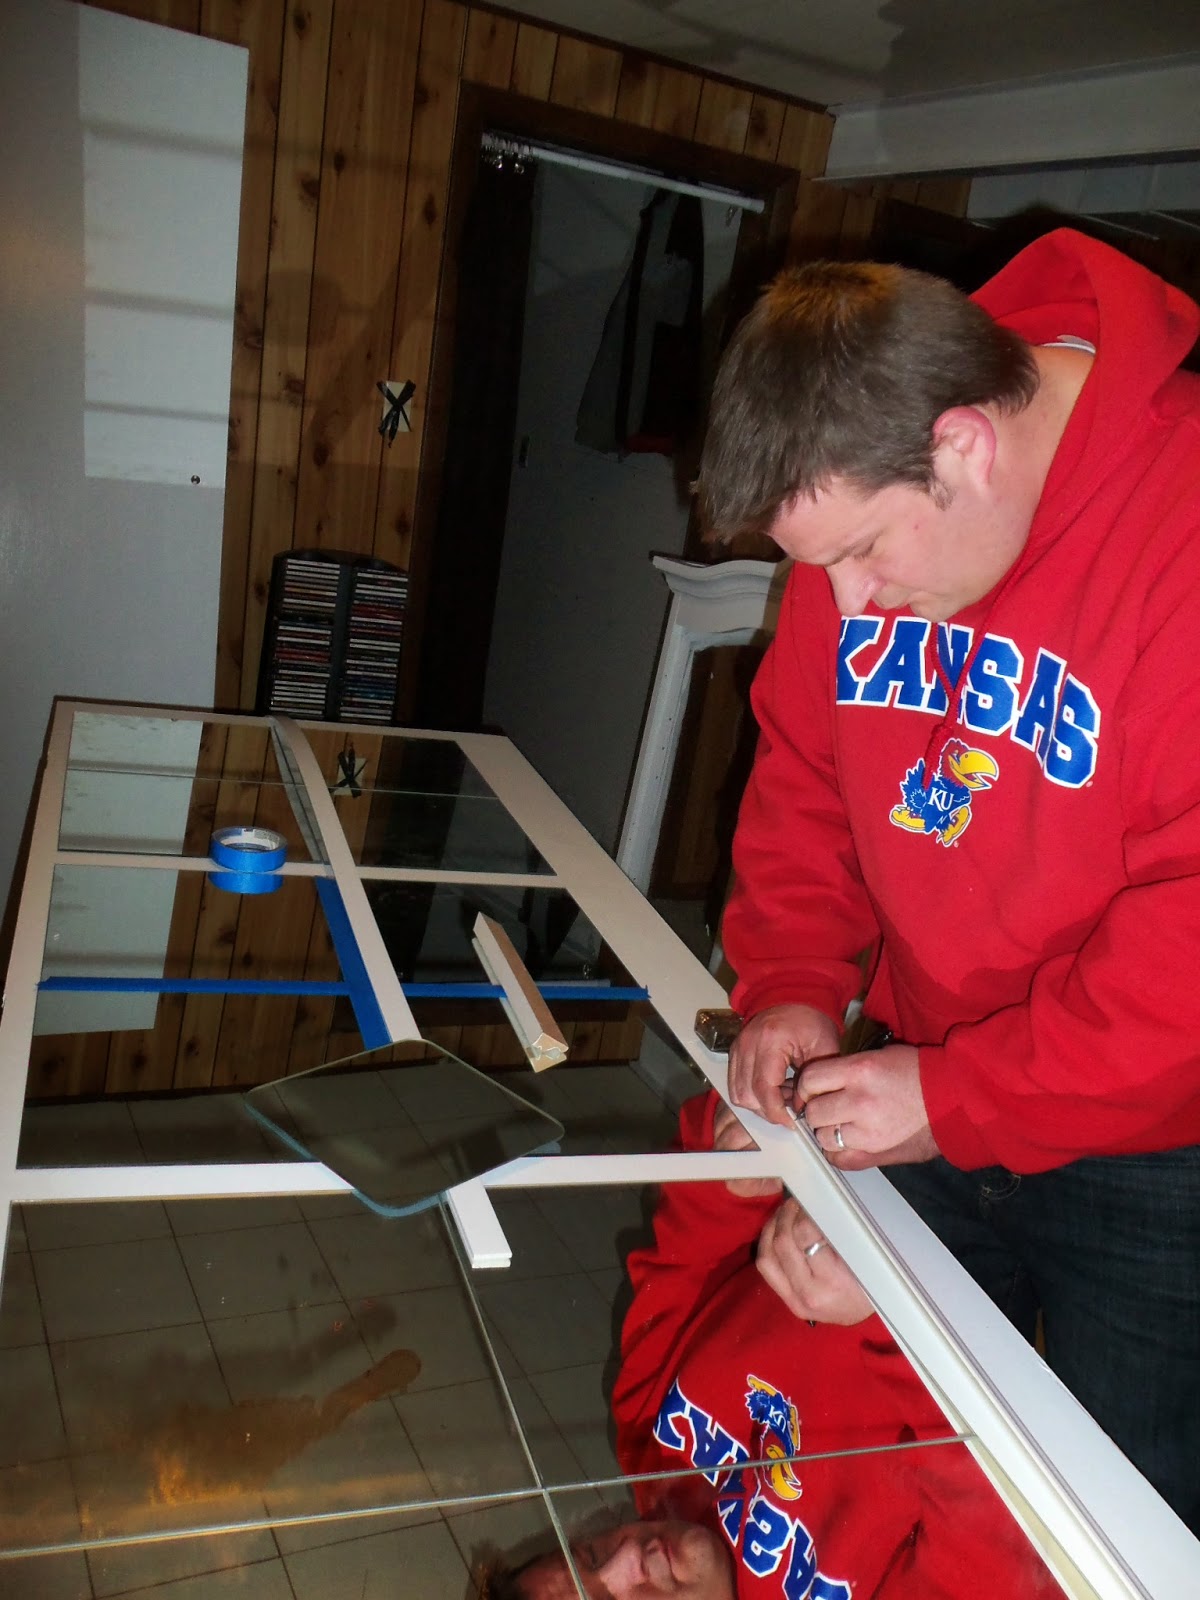
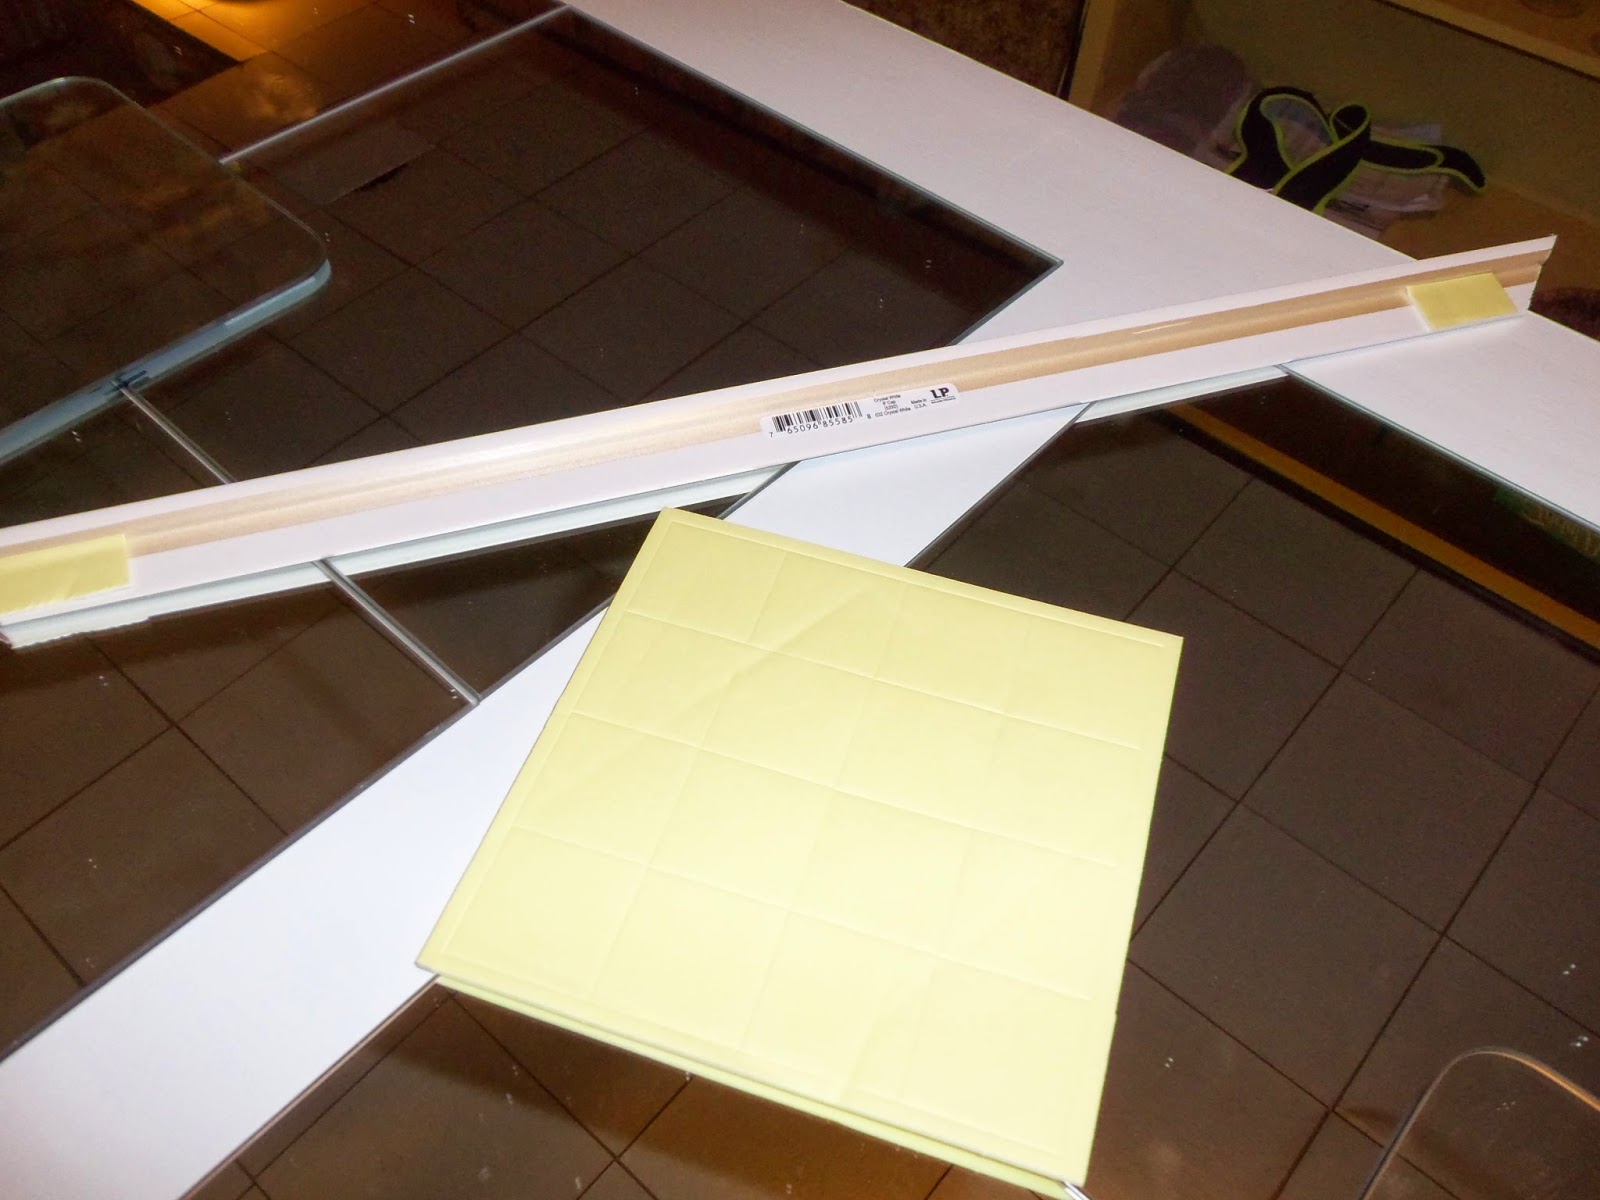
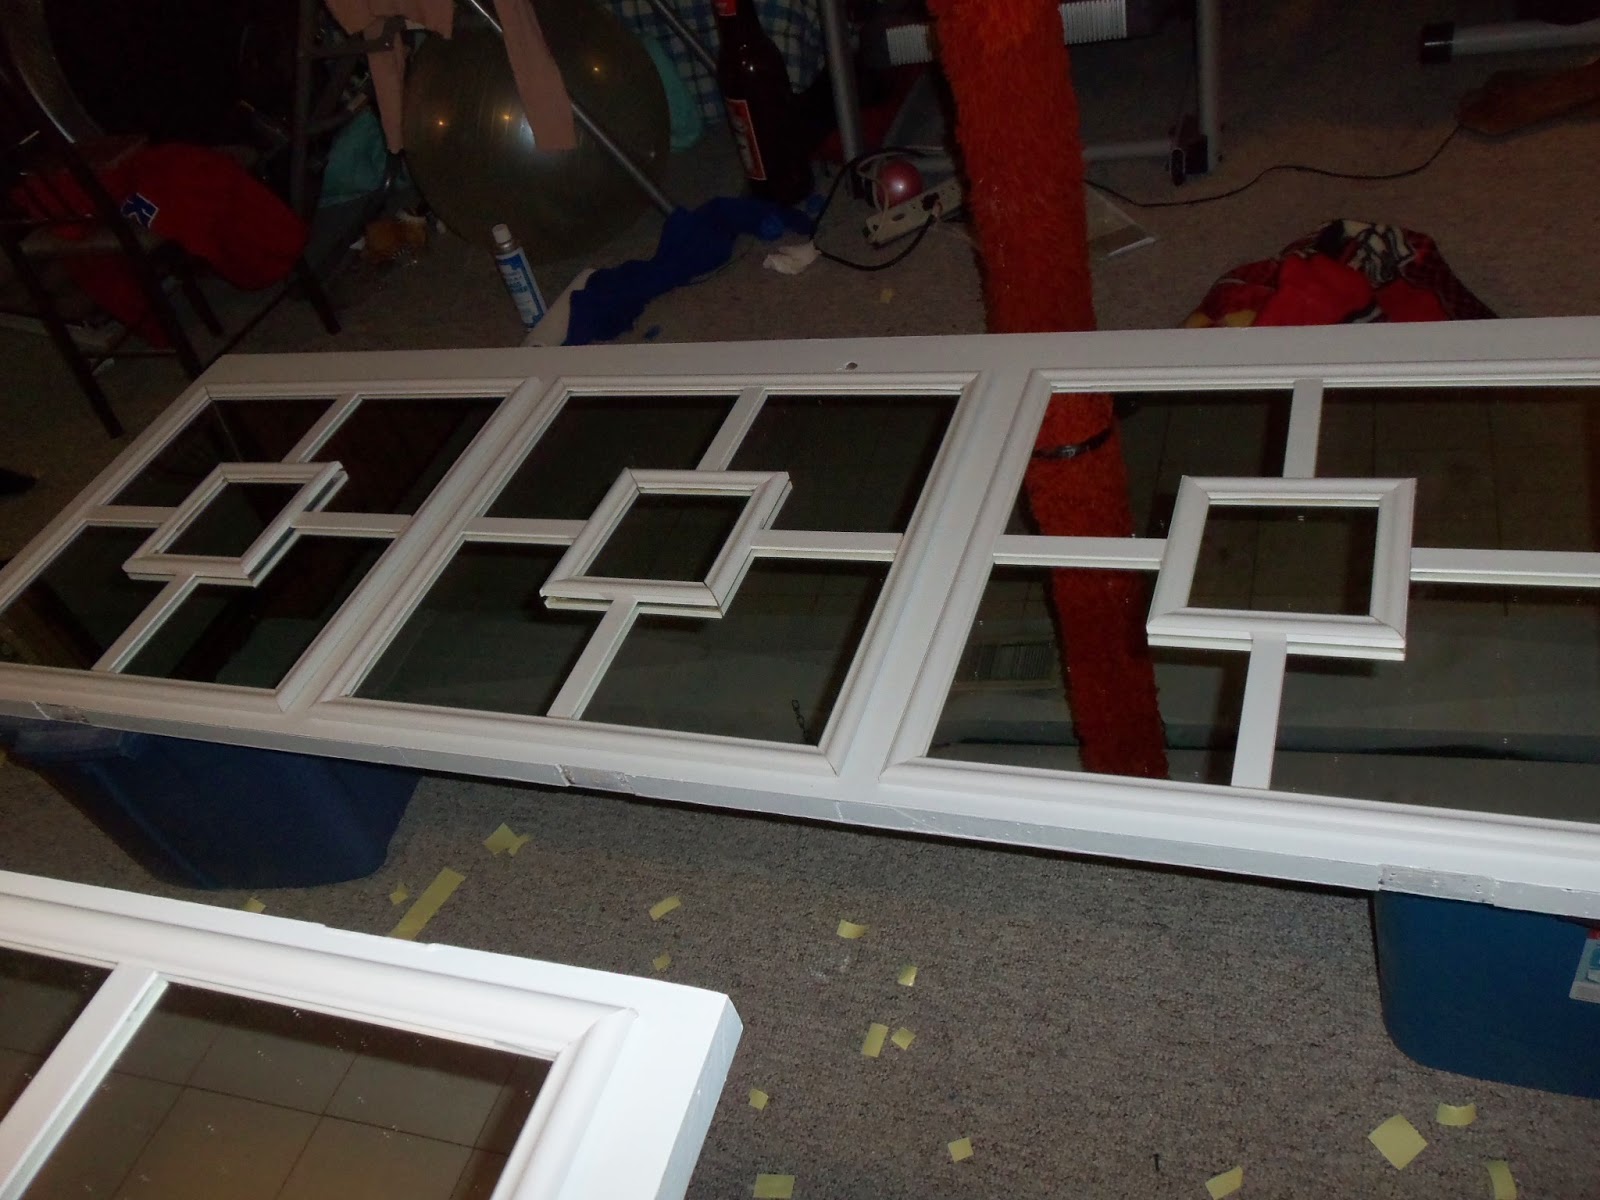
We went to the hardware store to find some trim that was pretty light weight and would fit around the mirrors. Then we set the trim around the mirrors to make sure it would fit.
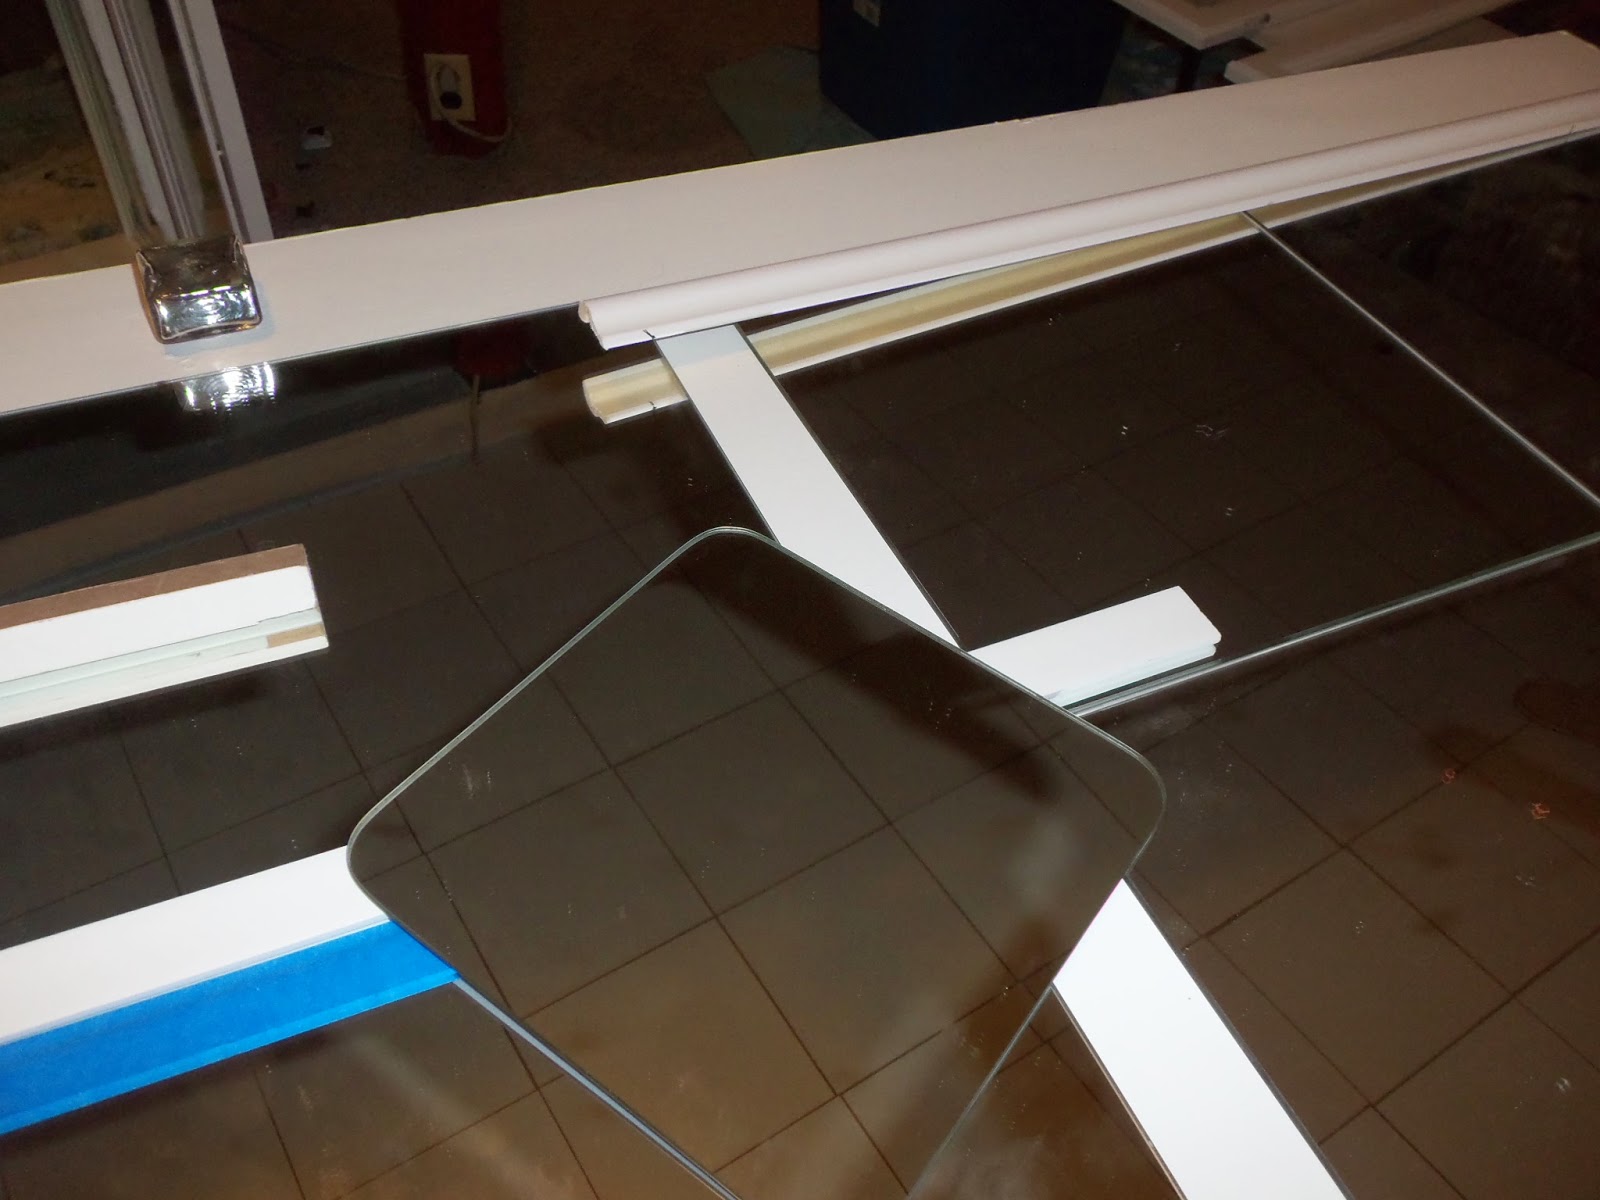
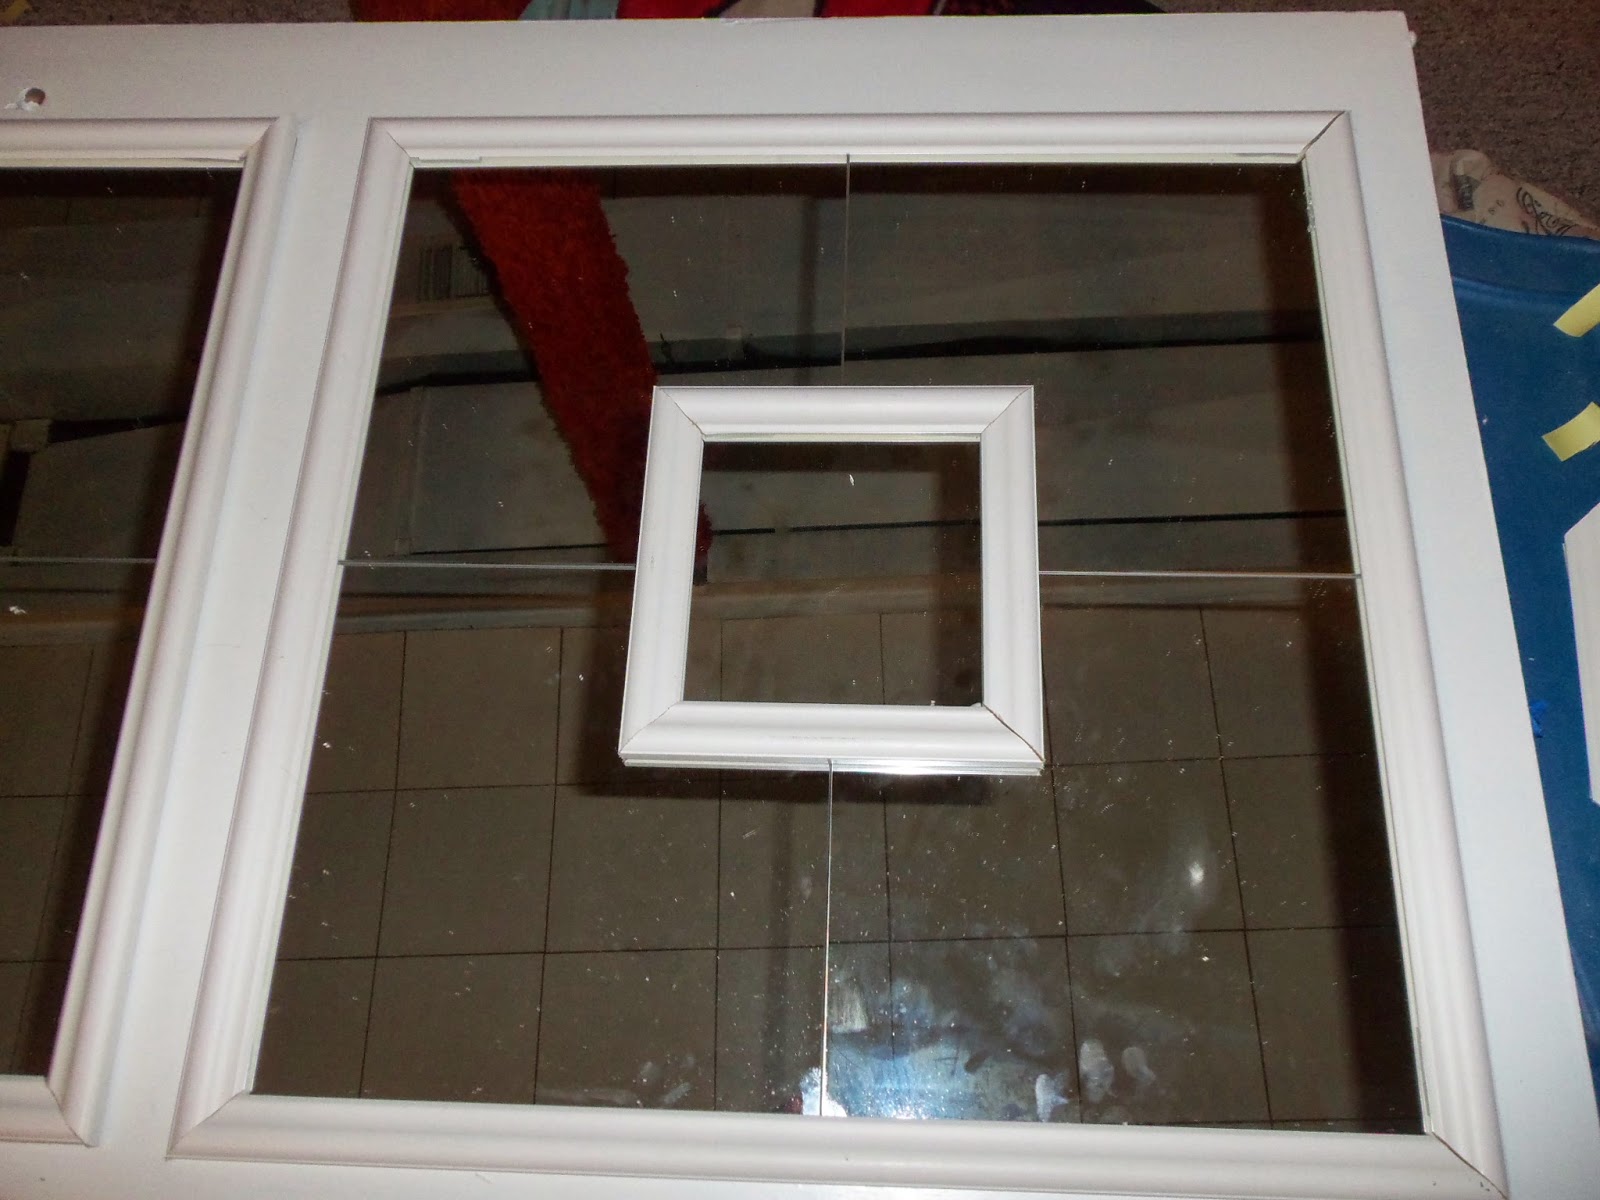
Adding the smaller mirrors When we placed the four large IKEA mirrors together we had a lot of seams that showed. I didn’t like the aesthetic so we decided to use the small mirrors and put them on top of the 4 larger ones and cover the seams with trim. . Then we would cover everything with trim. We set the small mirror on top of the 4 larger mirrors in the middle. We cut the trim down to fit one set of the mirrors to make sure the final look would be something I wanted. We measured the trim pieces so that the outer edge was slightly larger than the mirror and cut at a 45* angle and did the same for the smaller mirror in the middle.
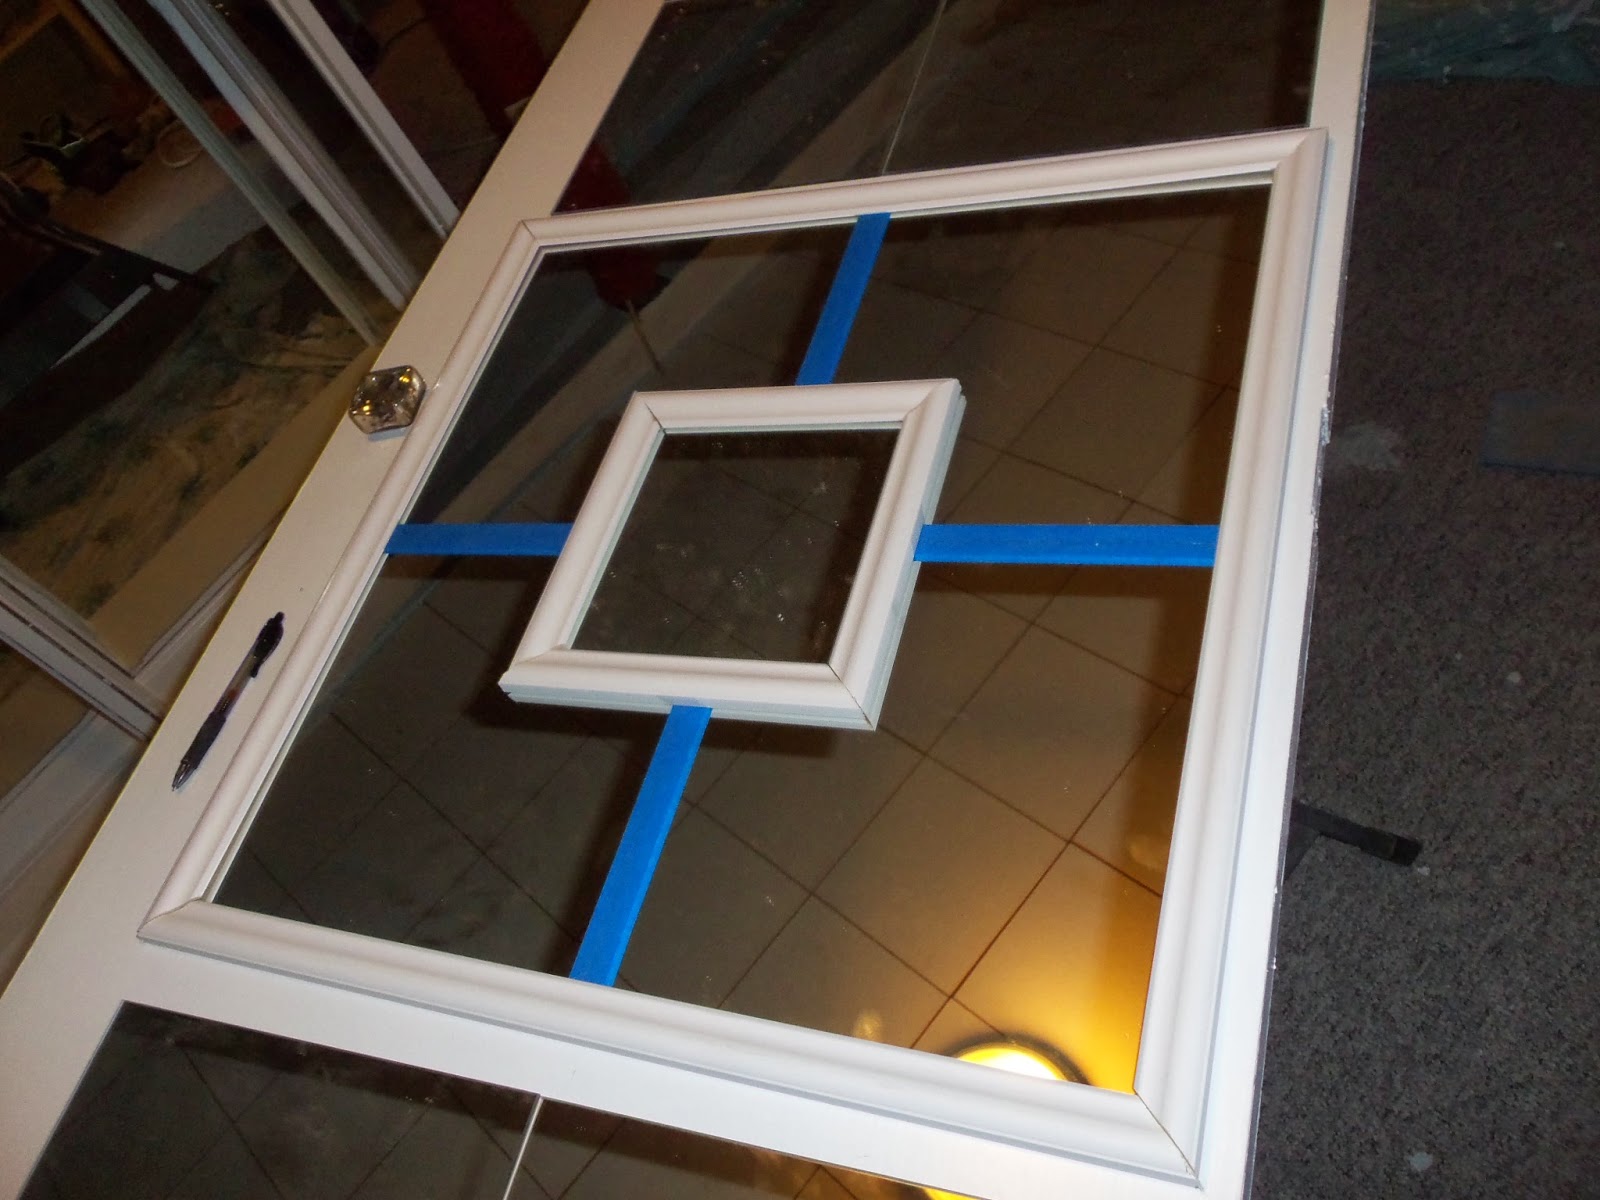
We really wanted to cover up the lines, so we used blue painters tape so we could get a better visual of what we wanted it to look like.
Once we had the design we laid out the rest of the IKEA mirrors and realized we were short 2 large mirrors. Luckily Hobby Lobby is up the street and they had 12″ x 12″ mirrors so we picked 2 more up. They were beveled and slightly larger, but with the trim we used would be able to mask that.
We decided it would be easier if we used duct tape to tape the 4 larger mirrors together so we could cut the frame pieces down to fit tight around them.
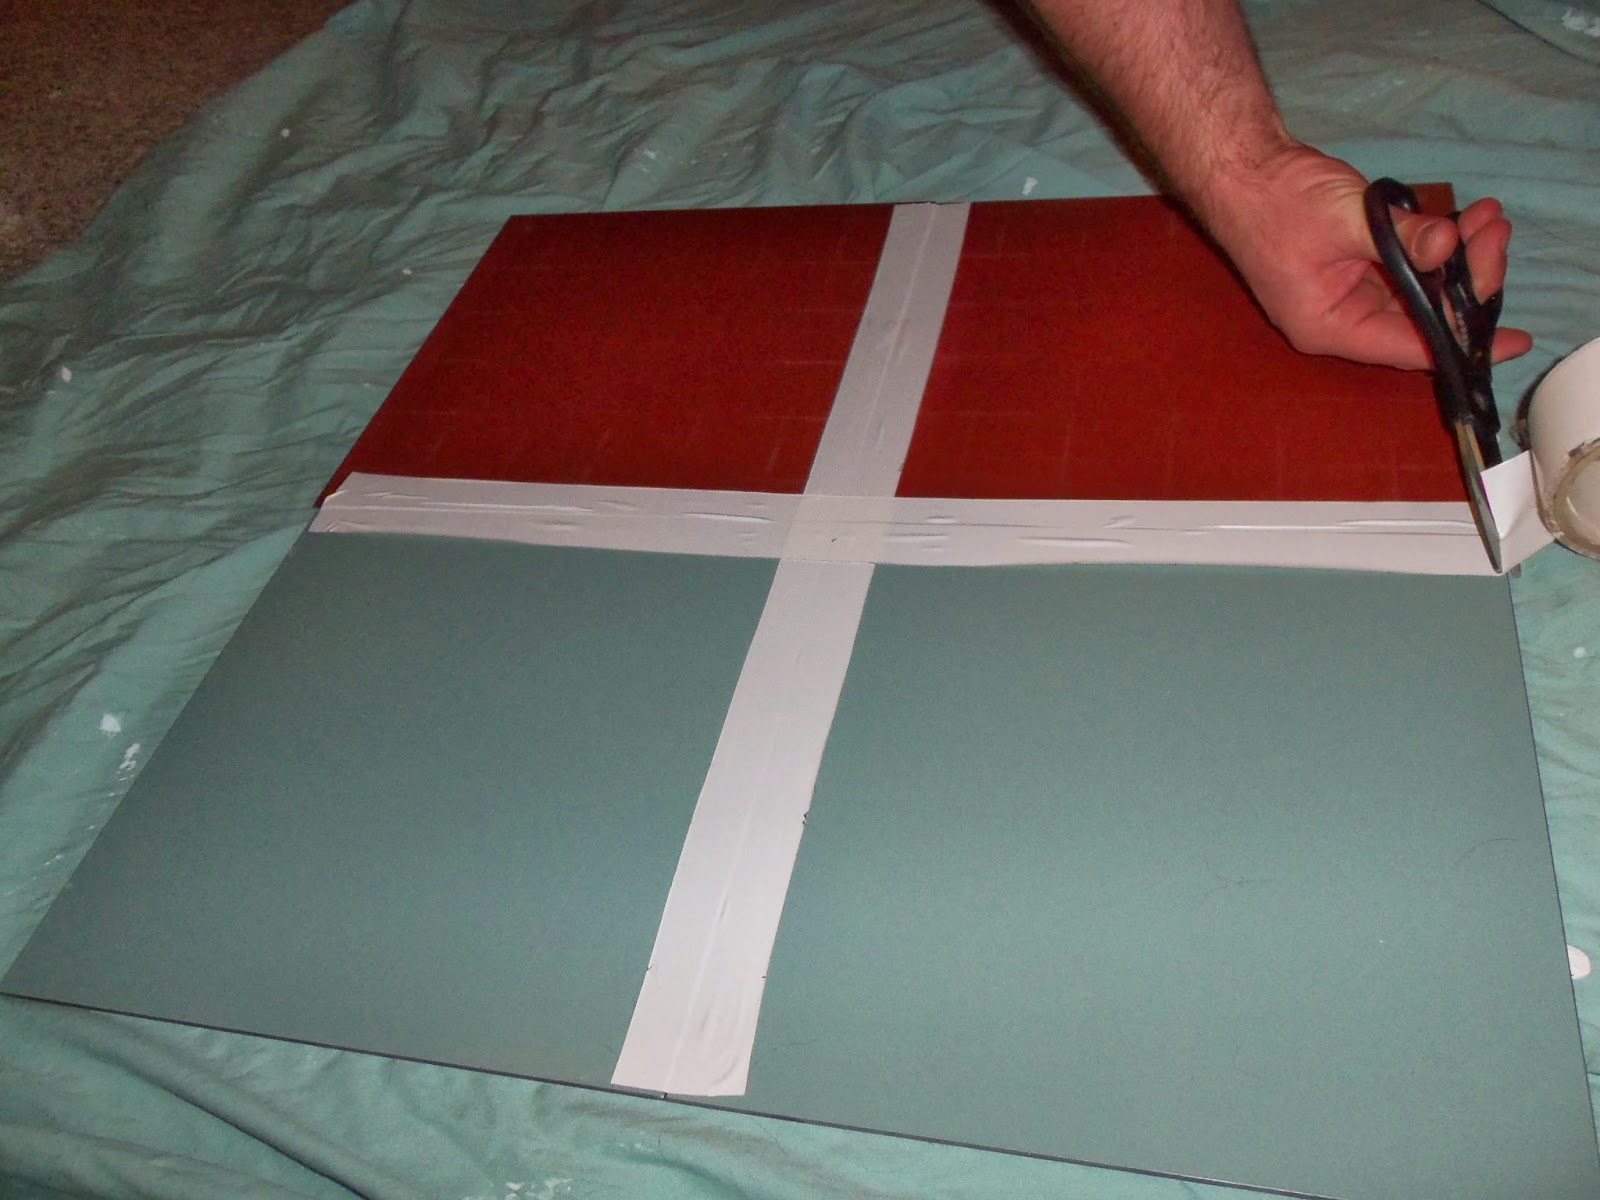
Once Brian got the first frame cut perfectly for the 4-mirror set, he cut 20 more the exact same size. Then did the same with the frame for the smaller mirrors. After that, we measured out the mirrors so they were even all the way across the door and used tape as markers so we could start gluing.

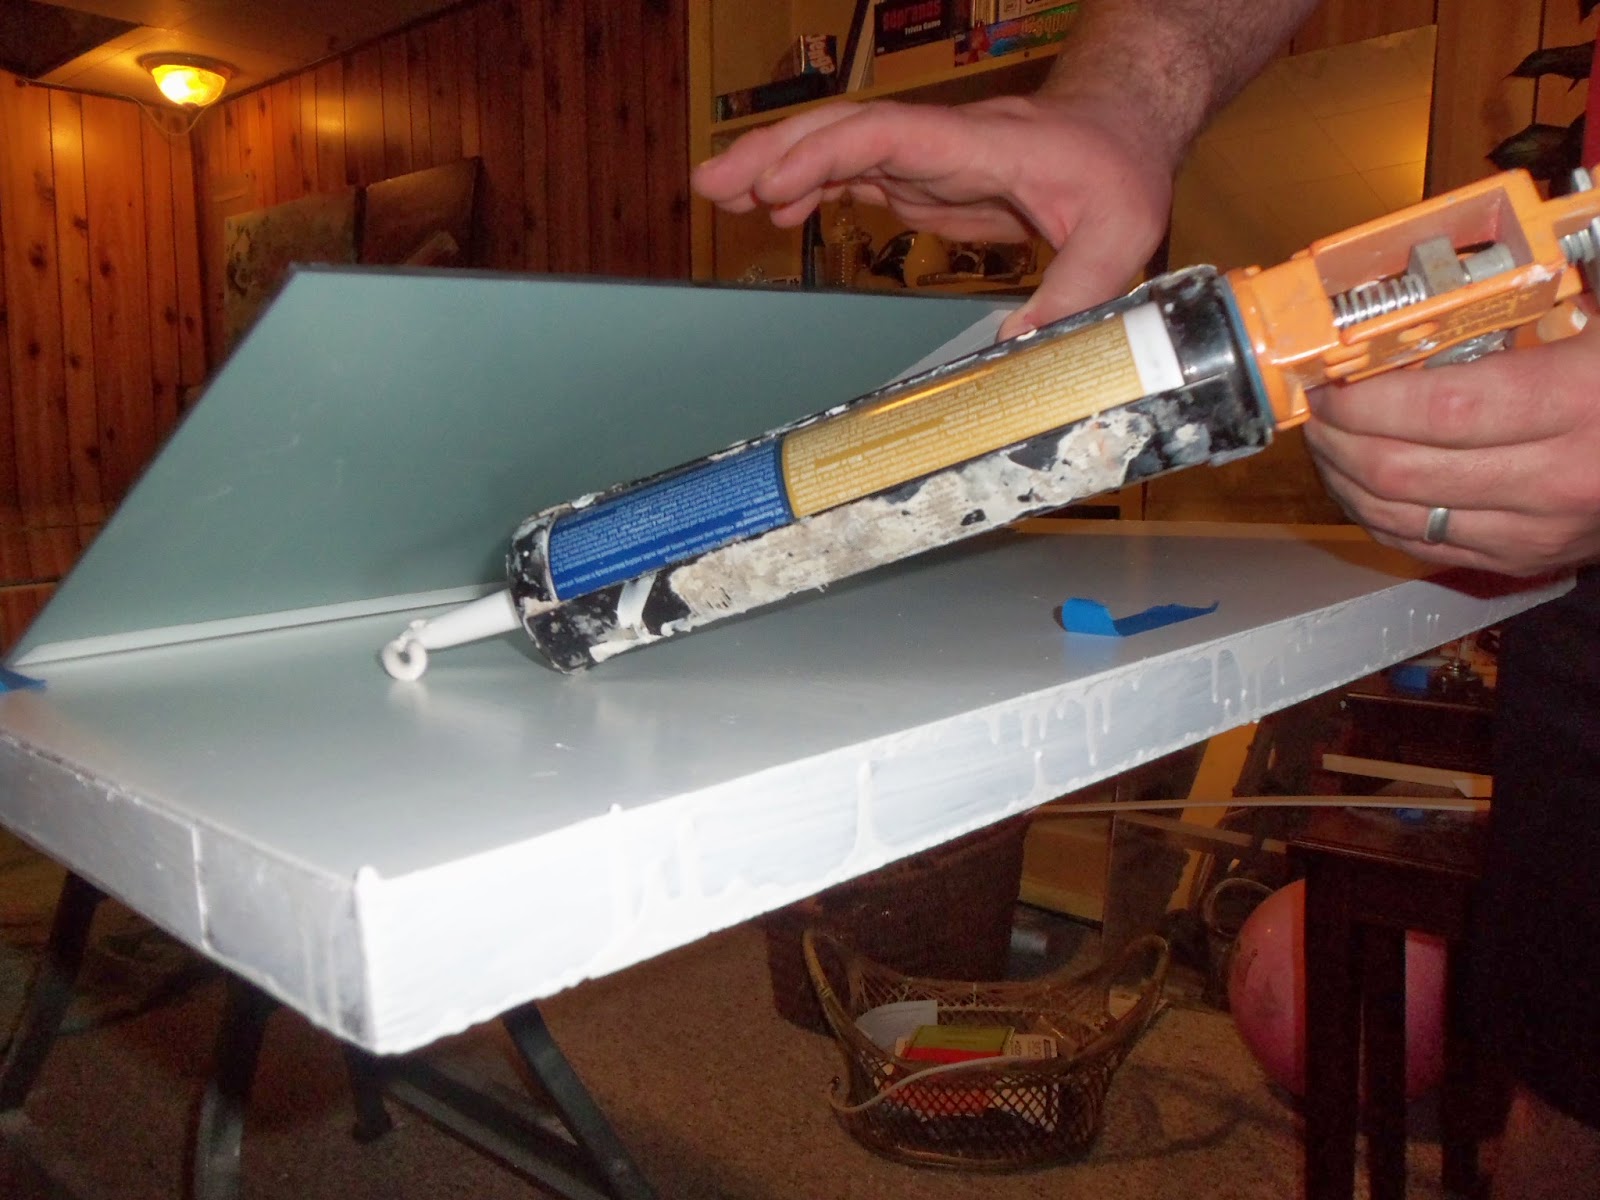
We would recommend using Liquid Nails Adhesive – Extreme Heavy Duty to glue the mirrors to the door. You can find it at most hardware stores and it is one of the strongest out there. The easiest way to glue the mirrors down is to lift up one side of the mirrors, add Liquid nails and set down carefully before moving to the next half.
Once you glue the mirrors down, let them dry and set for 24-48 hours at room temperature. The longer the better…we’ll get into our lesson learned in just a bit.
The Next Layer
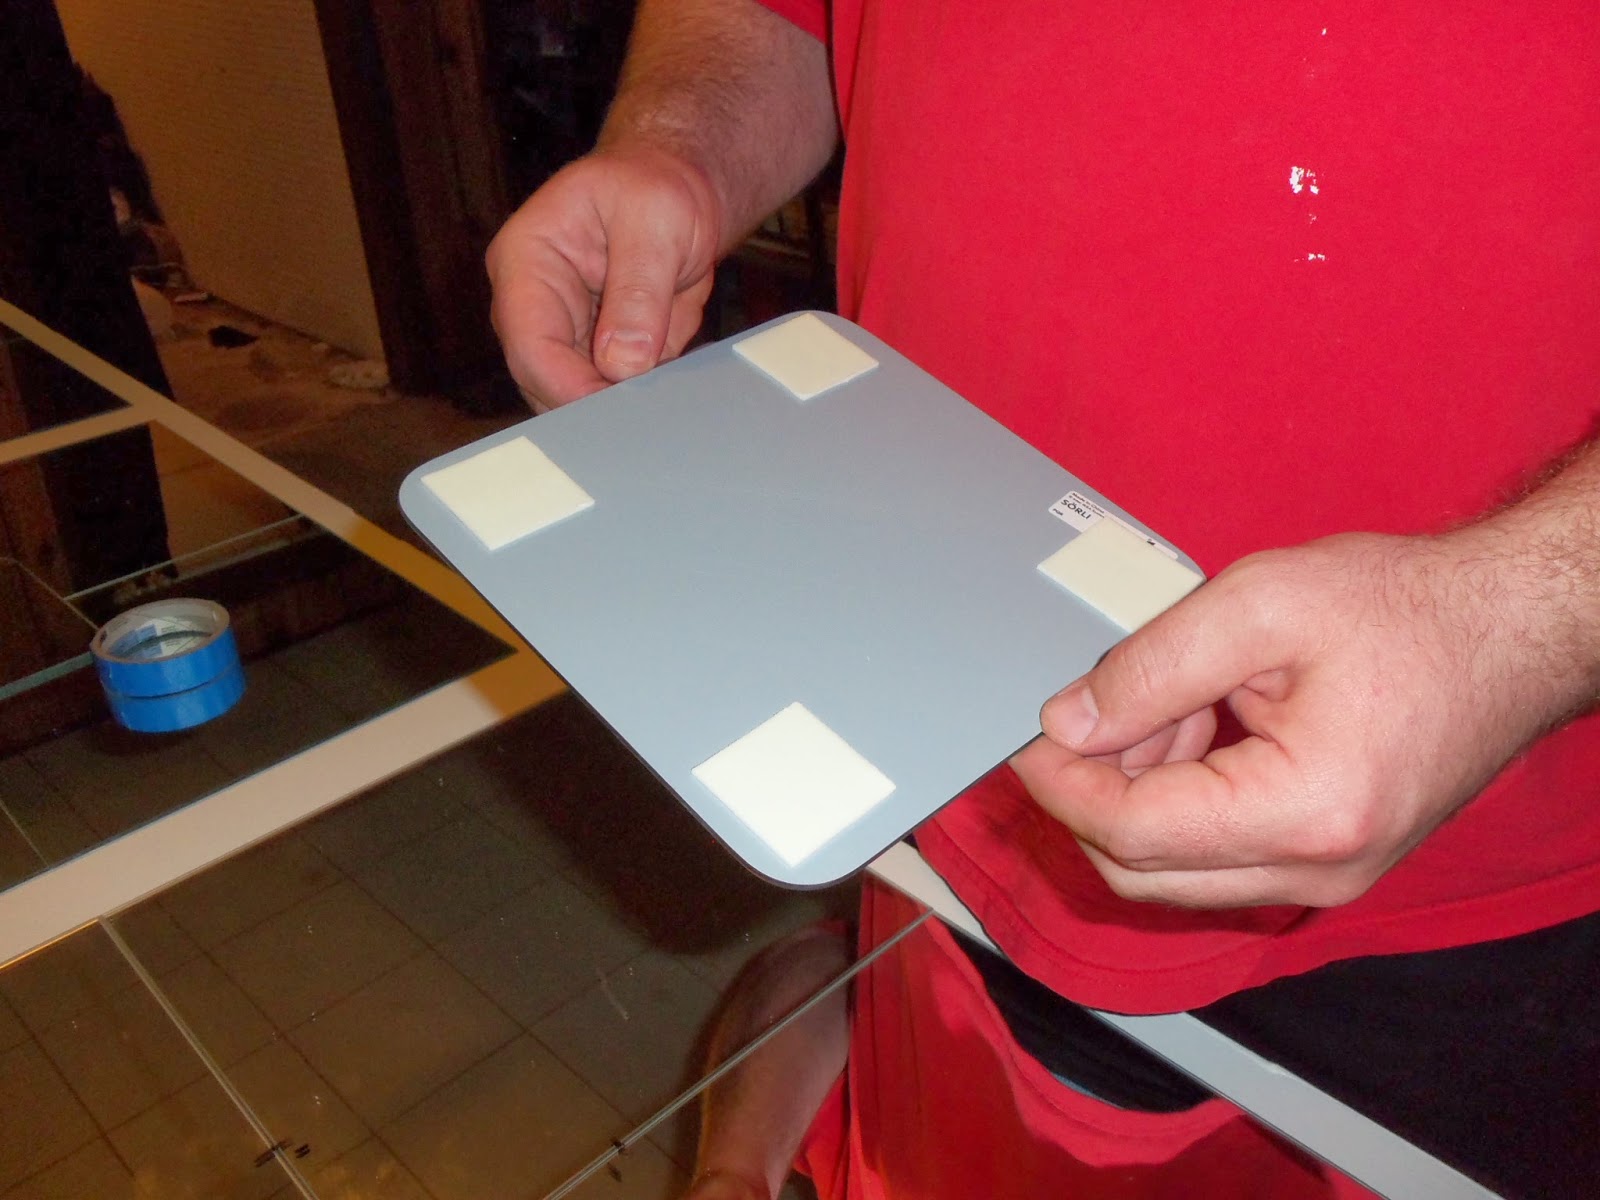
Once the base mirrors are set it’s time to get started on adding the little IKEA mirrors. When we did the back splash on our bar, we attached the mirrors to the drywall with the double-sided foam adhesive squares that came with the mirror. They have held up for almost a year now so we thought we would try and use those again for attaching the smaller mirror and the trim. It was a whole lot easier than using glue!
Before adding the adhesive, we placed the small IKEA mirrors back on top of the larger mirrors and marked all 4 sides with marker so we would know how to line it up.
We added the adhesive to the smaller mirrors first and centered them on the 4 larger mirrors. You’ll need a steady hand to slowly put the mirrors in place because once they are down, they are stuck and really difficult to get off so be careful!
Once the small mirrors were set, it was time to add the trim pieces. We used the same double-sided foam adhesive to all the trim pieces, cutting the foam adhesives in half to fit the trim as shown below:
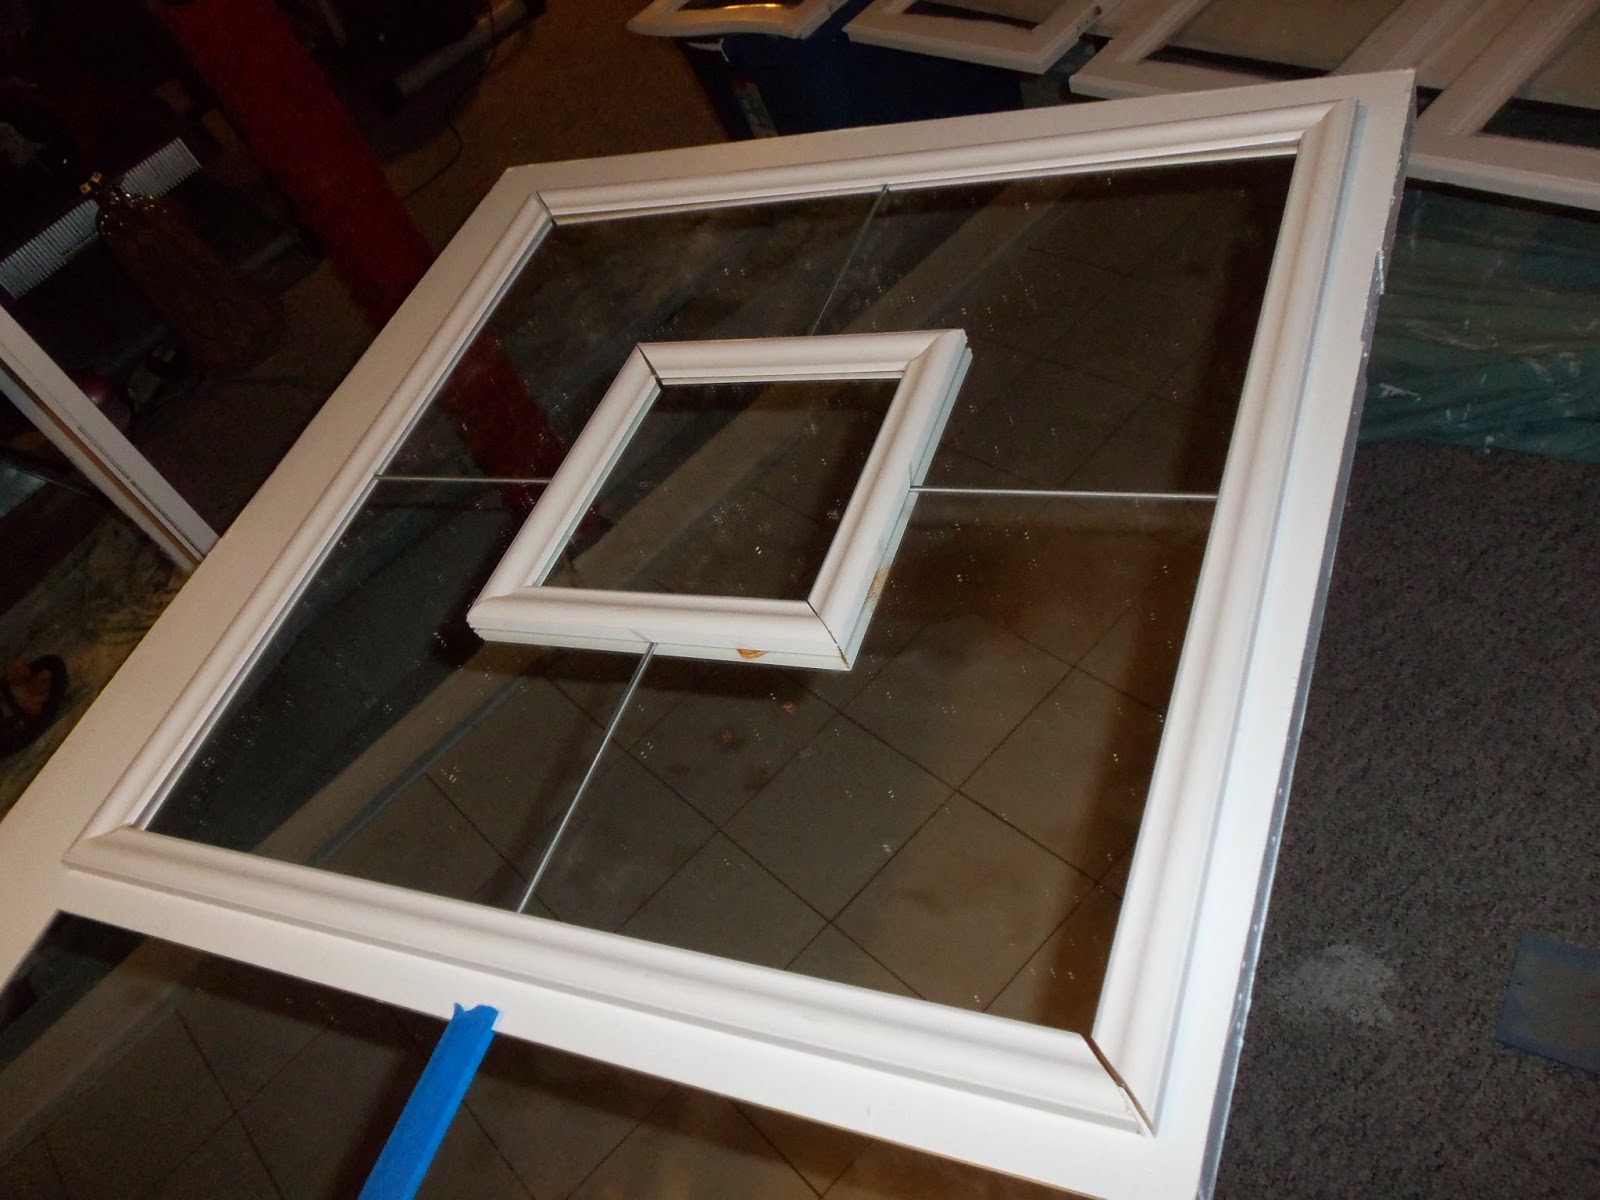
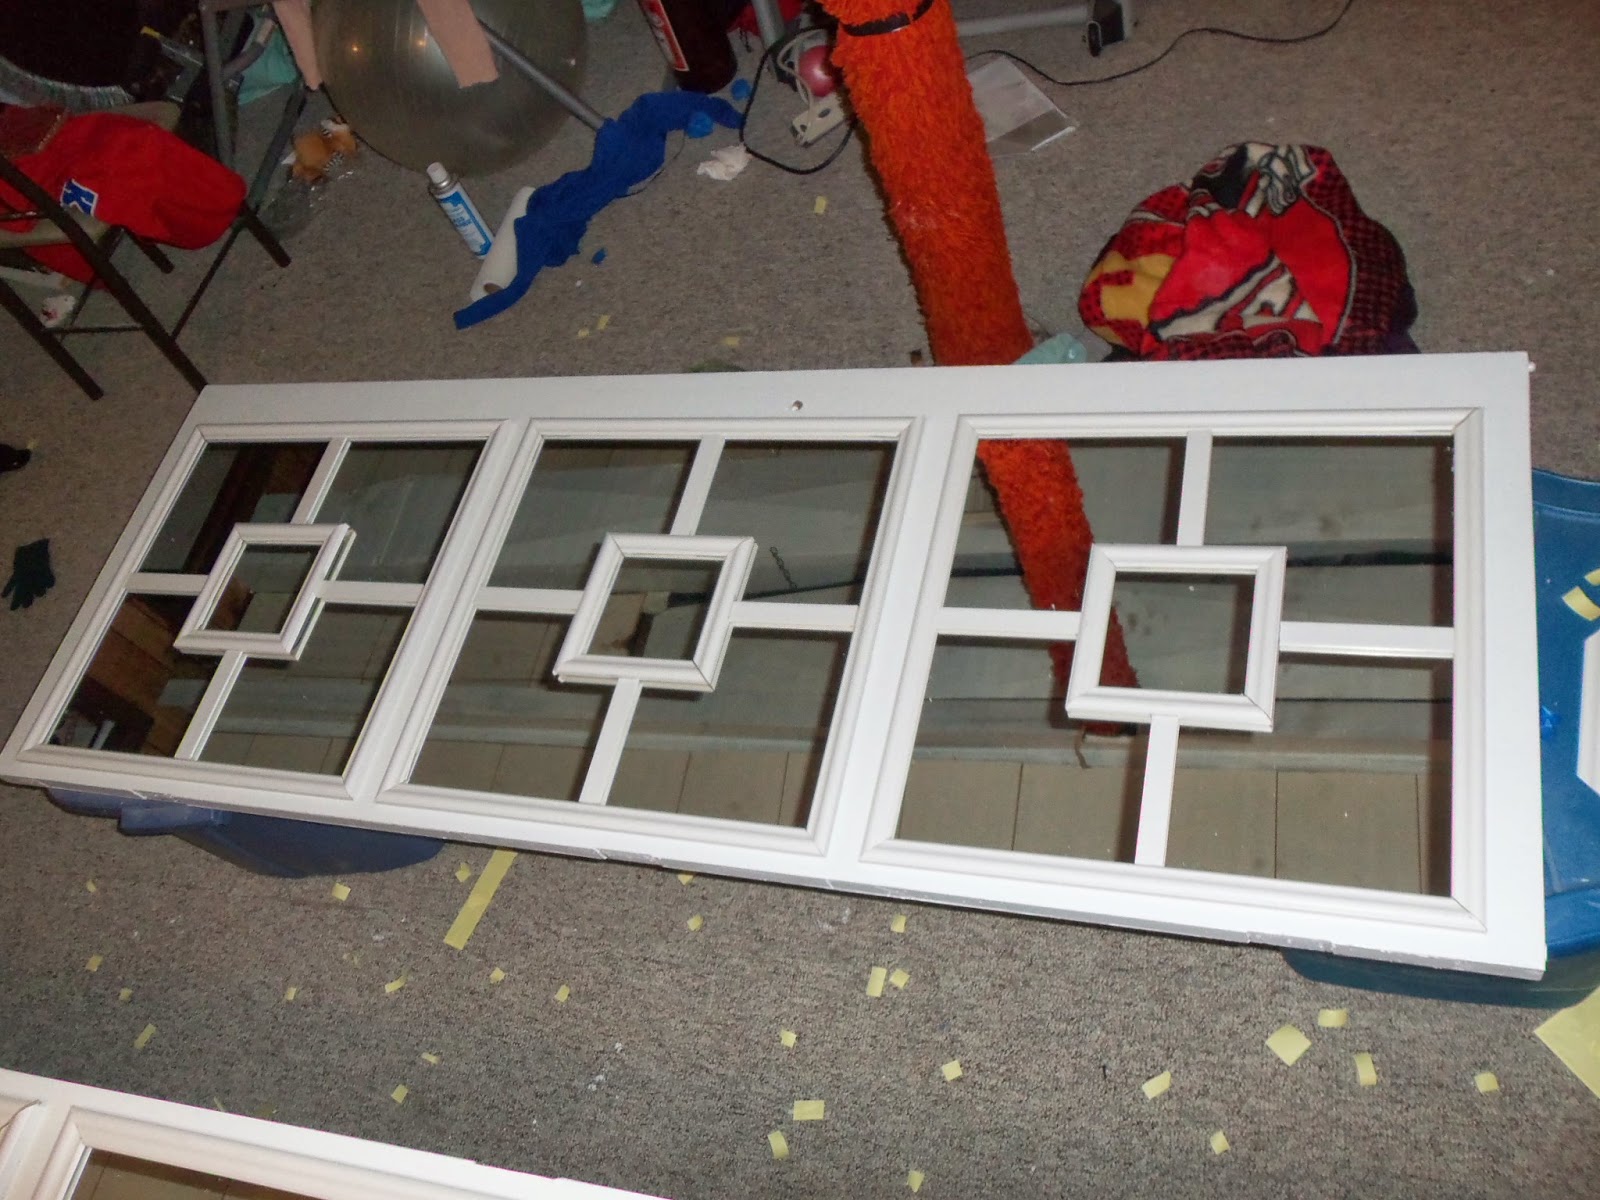
 We framed all the IKEA large mirrors with the trim and then did the same with the small mirrors in the middle.
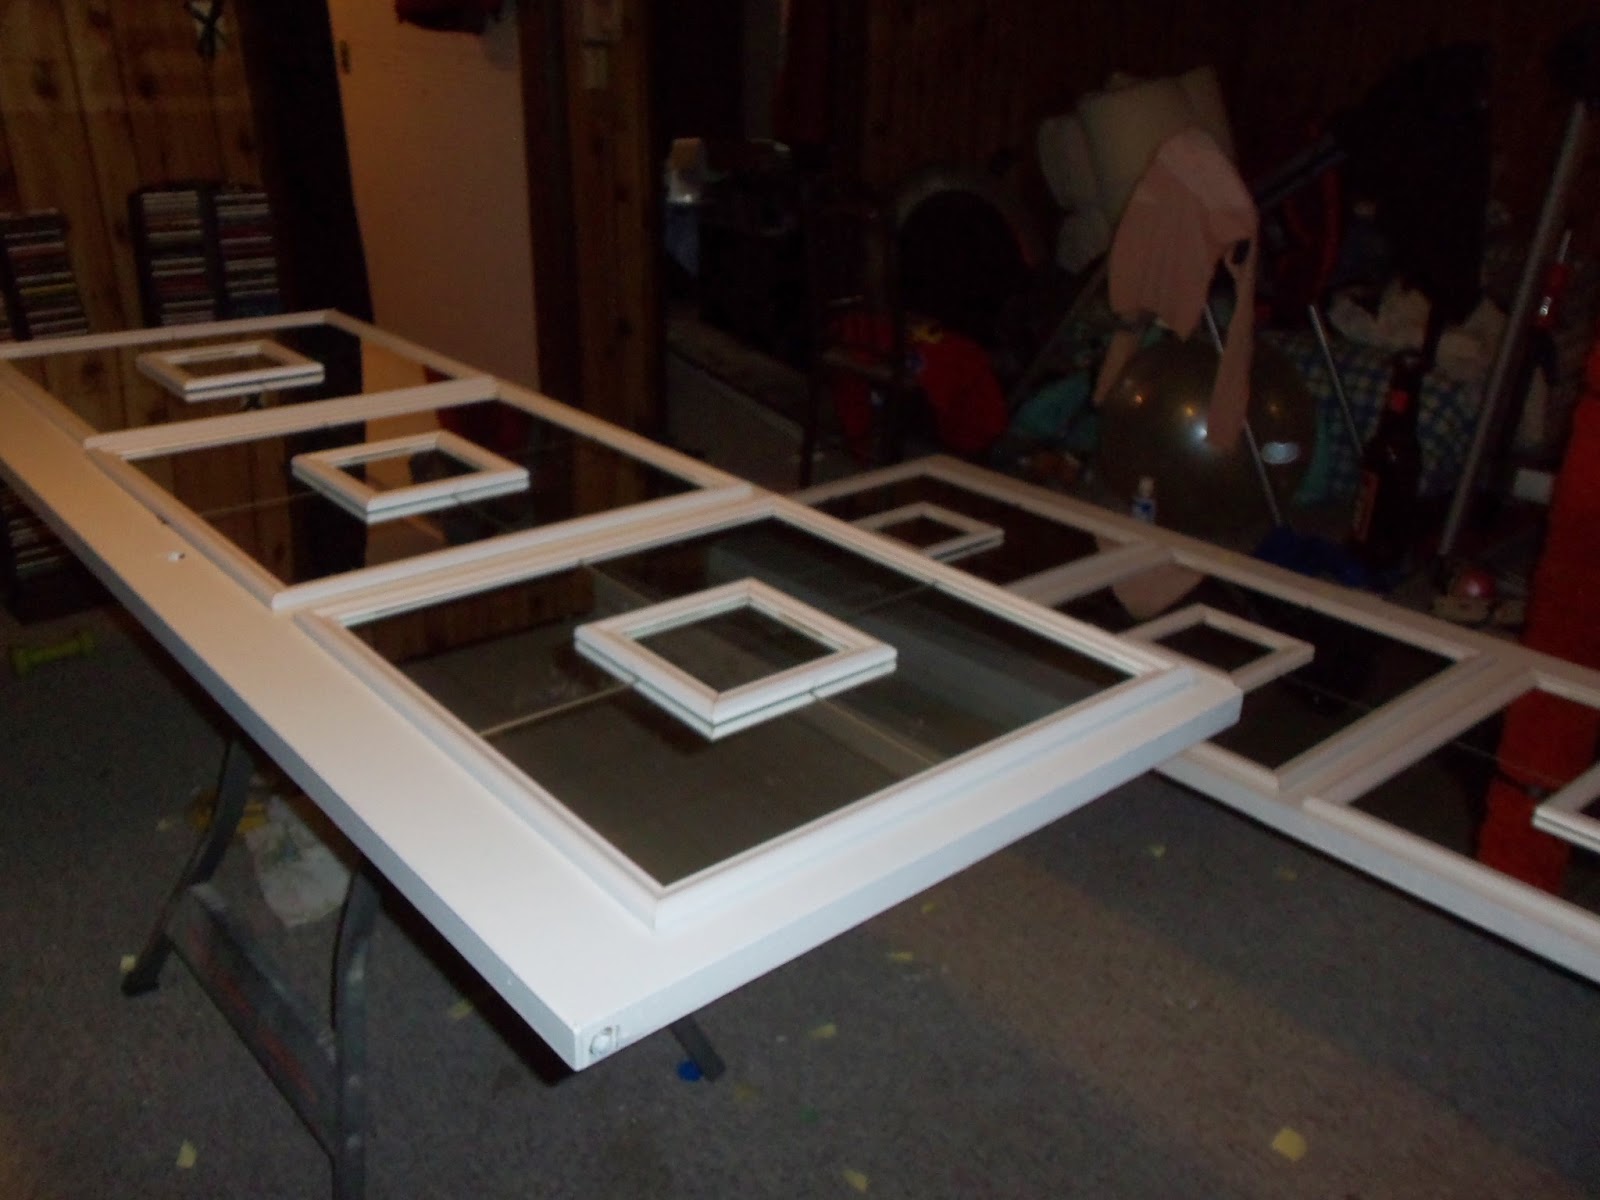
We measured the length between the larger frame and smaller frame so that we could cut the flat trim pieces. We measured and cut each separately to make sure that there was a tight fit. The outer trim had little lift on it so we were able to slide the flat pieces underneath before securing with the adhesive.
Finishing Touches
Then Brian went through and caulked all the edges and sealed the frames. Once the caulk was dry he painted the frames the same white paint we used on the door. As we always say, a little caulk and paint will make you a (DIY) saint!
Time to Hang the Doors…Oops (Lessons Learned)
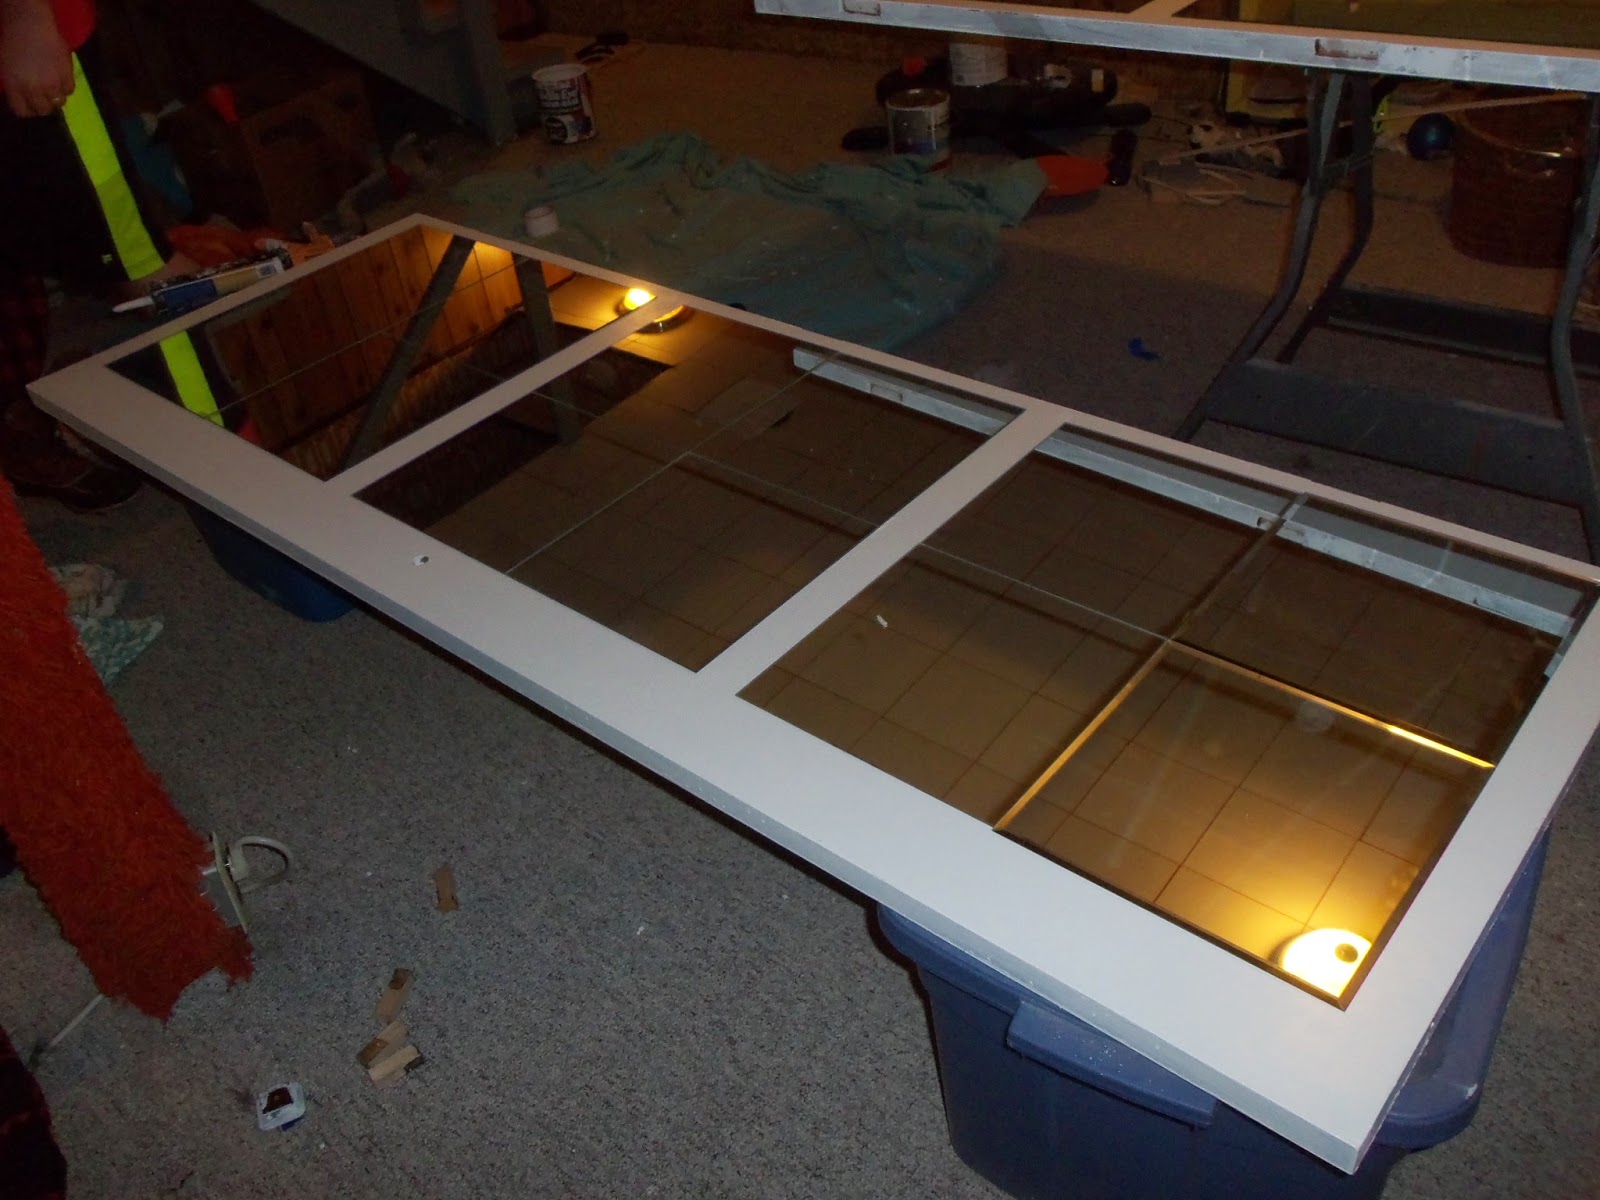
We let the paint dry for most of the afternoon and then it was time to bring them upstairs to hang. That’s when everything went wrong. Saturday was a beautiful 75*, sunny and amazing out. We had spent most of the day outside and glued the windows to the doors and let them set. Pretty simple, right? Wrong. Because Kansas weather in the spring is anything but normal, overnight the temperatures outside dropped below freezing, we got some snow and the high on Sunday was in the mid-30’s. It happened so quickly, we forgot to turn on the heat until Brian woke up early on Sunday freezing.
We didn’t think it would affect any of the work because everything had been setting for several hours and when we added the trim there wasn’t any movement so we thought the glue had set. We were wrong…really wrong. Brian carried the doors upstairs and just as we were adding the first hinge, the bottom 2 mirror clusters started sliding down! It was a mess! The glue wasn’t able to set all the way and the mirrors were so heavy that when they were vertical they slowly slid right off. I didn’t get any pictures because I burst into tears that everything was ruined (I can be a tad dramatic at times).
Luckily, Brian keeps a cool head and he got the mirrors reset and fixed everything while I had my mini-meltdown. We kept the doors upstairs and let them set for another 48 hours. The doors were super heavy, so I was still a little nervous that they would be too heavy to hang. I think we both held our breath while Brian was screwing in the first couple of hinges.
Then…drum roll, please…
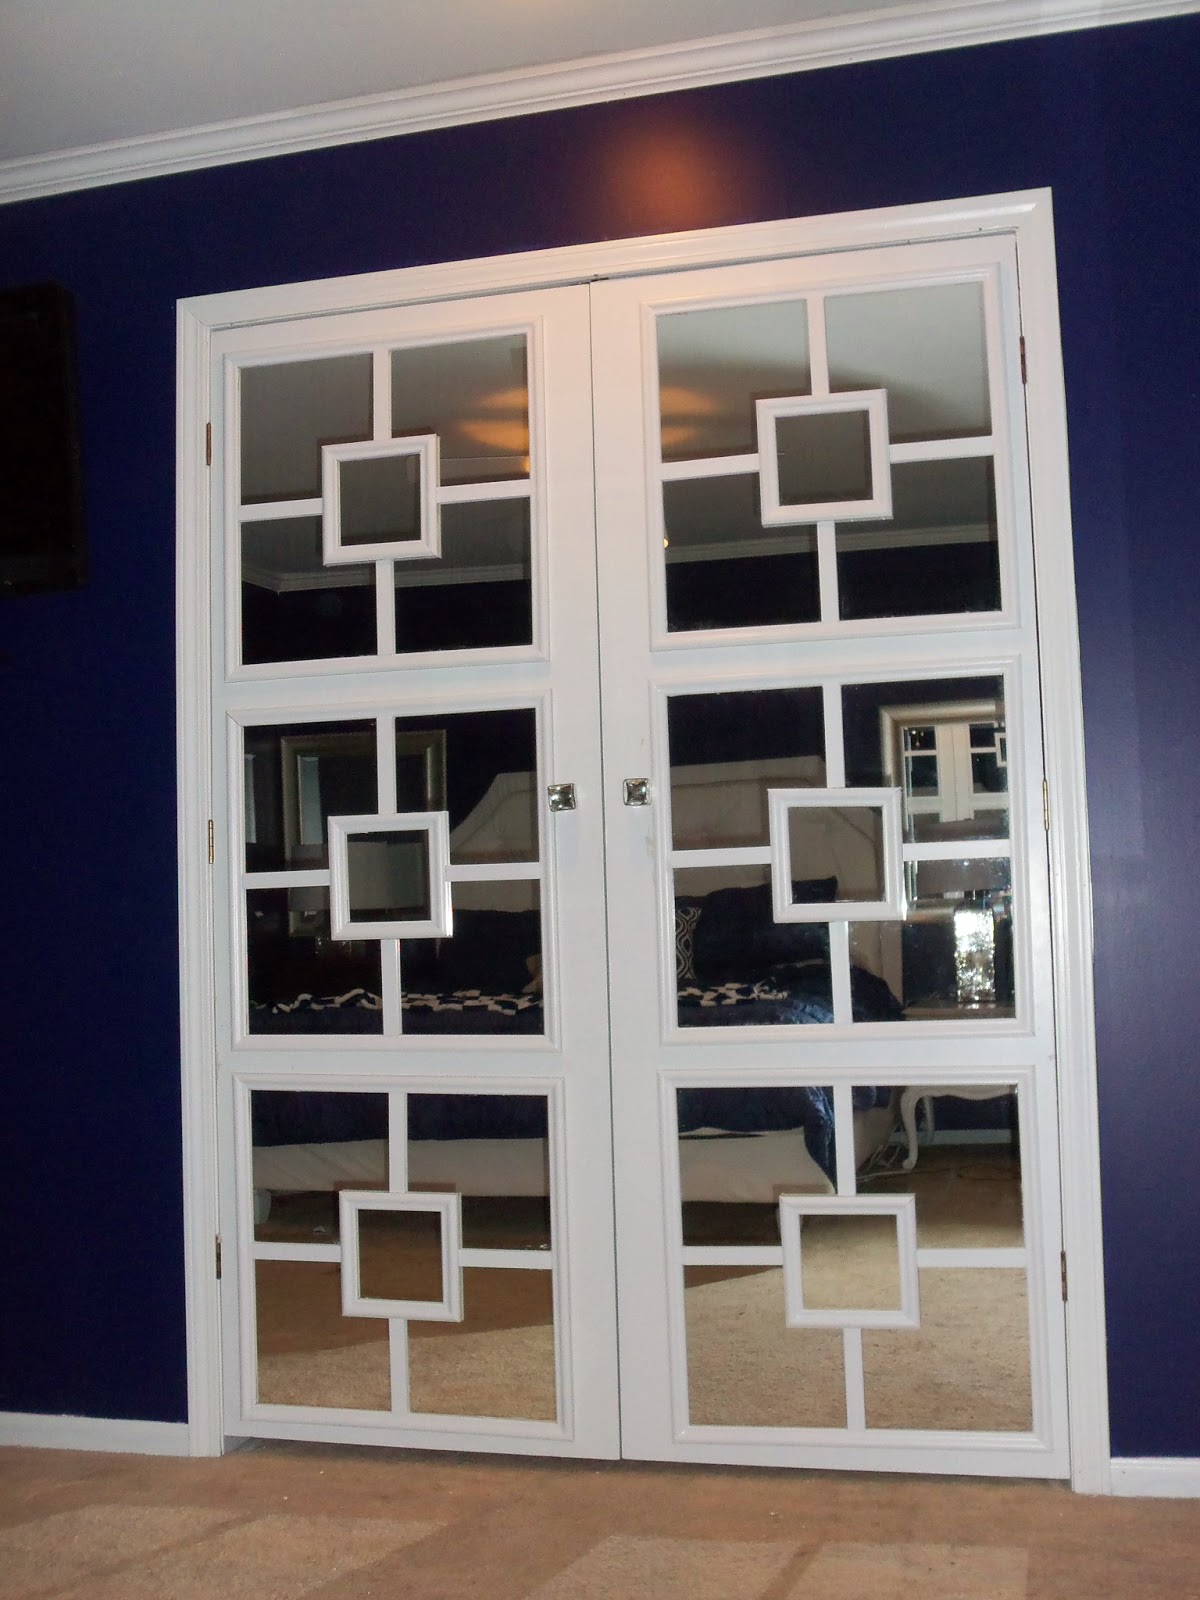
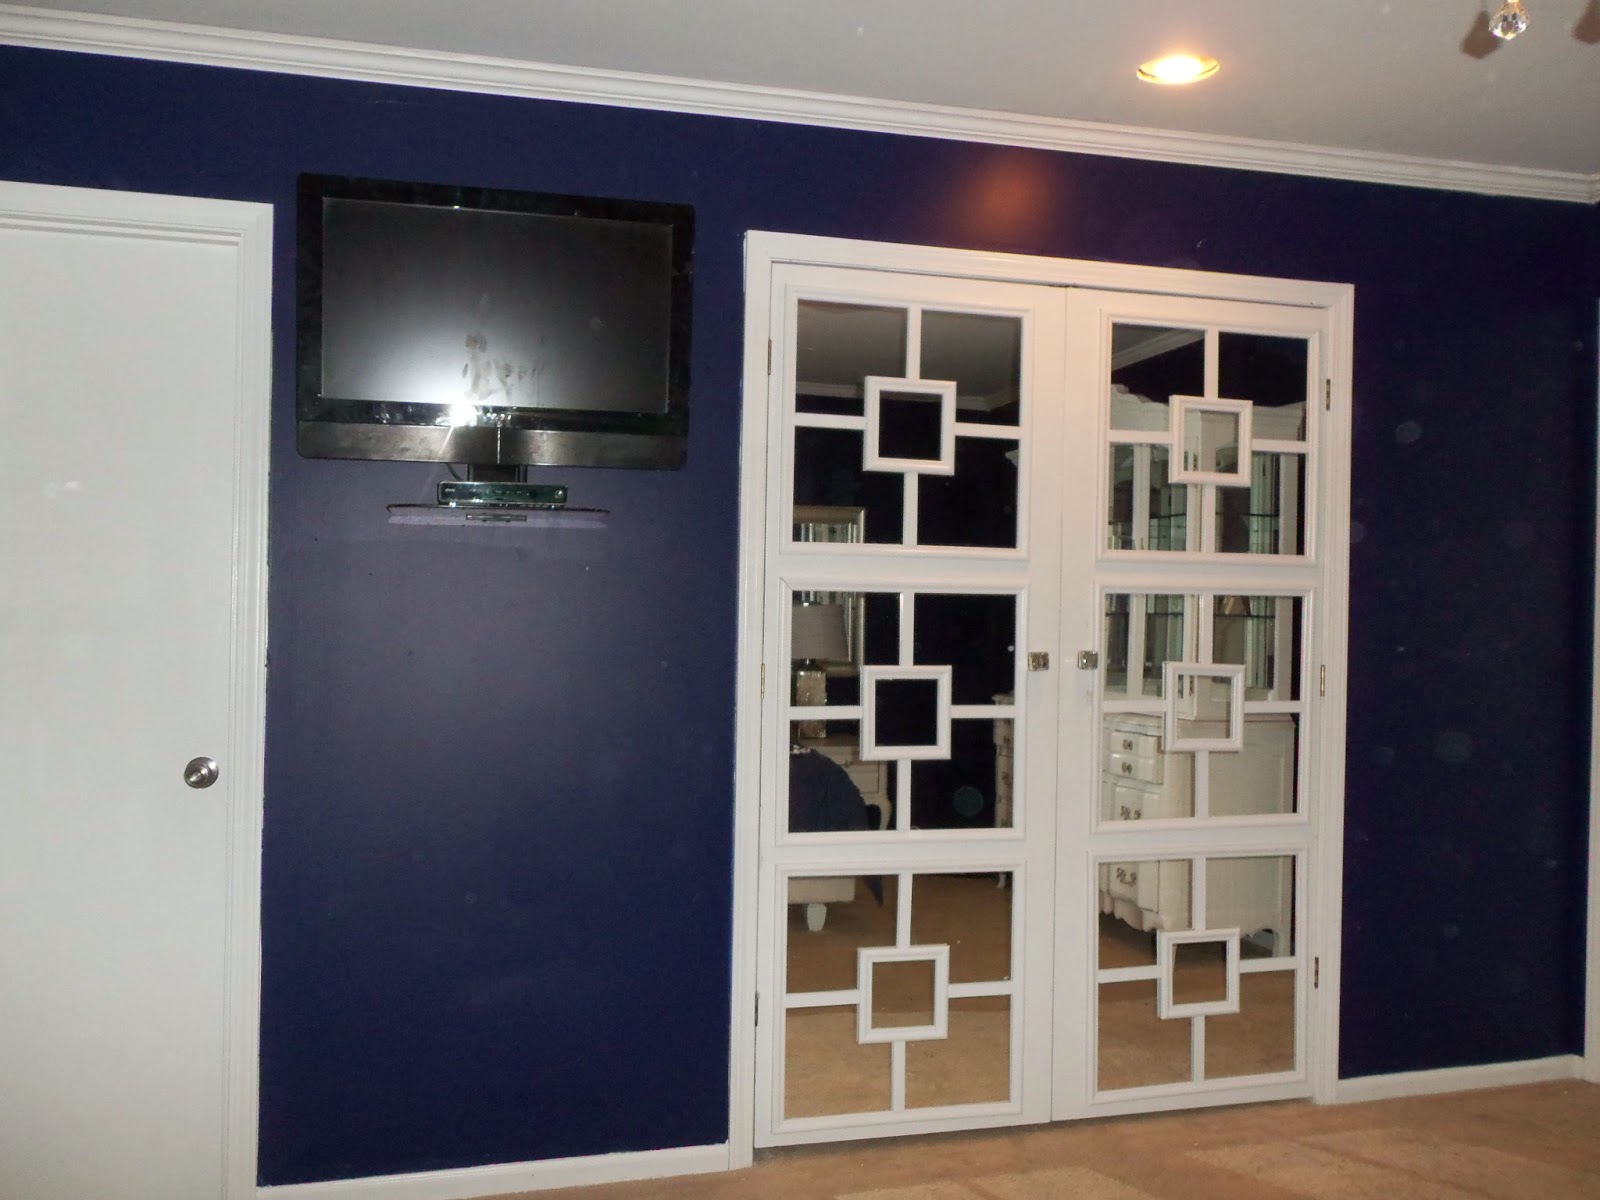
I am so excited about how they turned out! And we reused our wedding mirrors, so we only spent $35 on the trim, the 2 Hobby Lobby mirrors, Liquid Nails and the new knobs! Not too shabby!
The mirrors add extra light and make the room seem even bigger so this project was a complete win, after a few slight mishaps. It’s been over 4 years and they are still one of my favorite pieces in our master bedroom. Plus the girls love to come in our room and twirl in front of them.